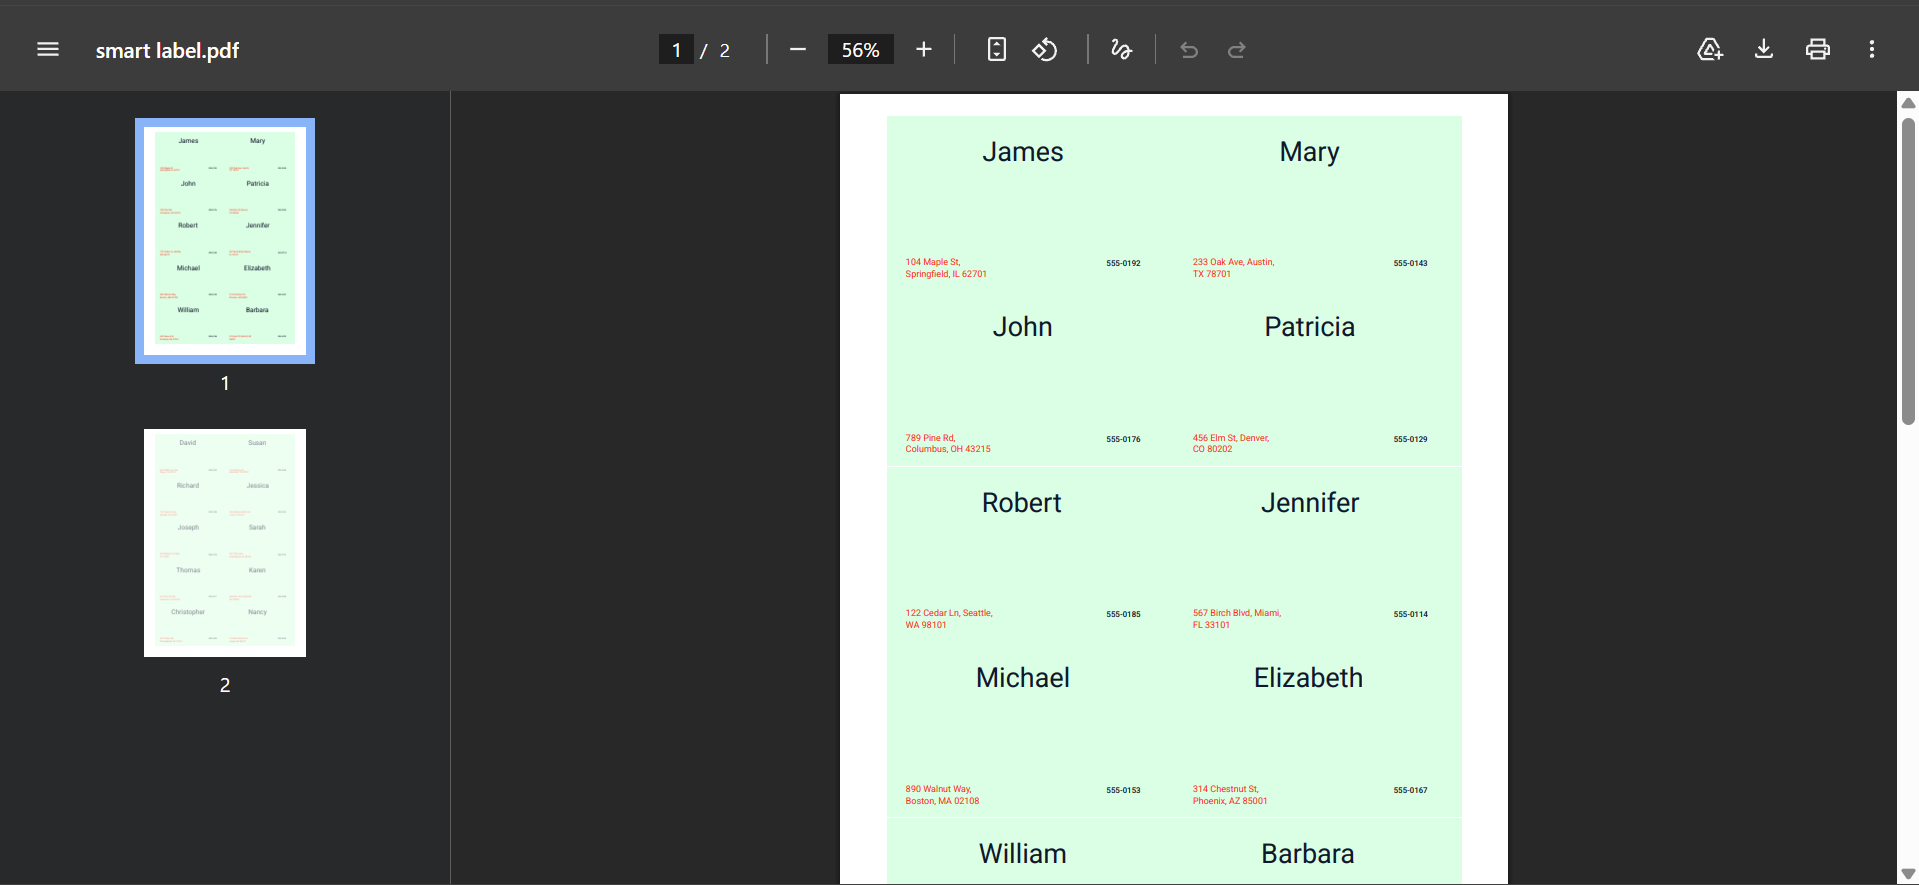
How to create plain labels in Google Sheets?
This tutorial shows you how to design and print a sheet of labels containing a name, phone number, and address — each pulled automatically from your Google Sheet, so every label gets the correct details for that row. No images or extra design elements are needed. If you want to add images or more advanced elements, see our guide on how to make labels in Google Sheets instead.
For this tutorial your spreadsheet should have at least these three column headers in the first row:
| FirstName | Phone | Address |
|---|---|---|
| John Smith | +1 (555) 000-1234 | 123 Main Street, New York, NY 10001 |
| Jane Doe | +1 (555) 000-5678 | 456 Oak Avenue, Los Angeles, CA 90001 |
Here is a summary of this step-by-step guide:
- Open Smart Label Maker
- Select a template
- Connect your spreadsheet
- Add the name
- Add the phone number
- Add the address
- Arrange and style
- Preview your labels
- Generate PDF
- Print labels
1. Open Smart Label Maker
Open Smart Label Maker from Google Sheets or Google Drive. If you are not sure how to do this, see our guide on how to open Smart Label Maker.
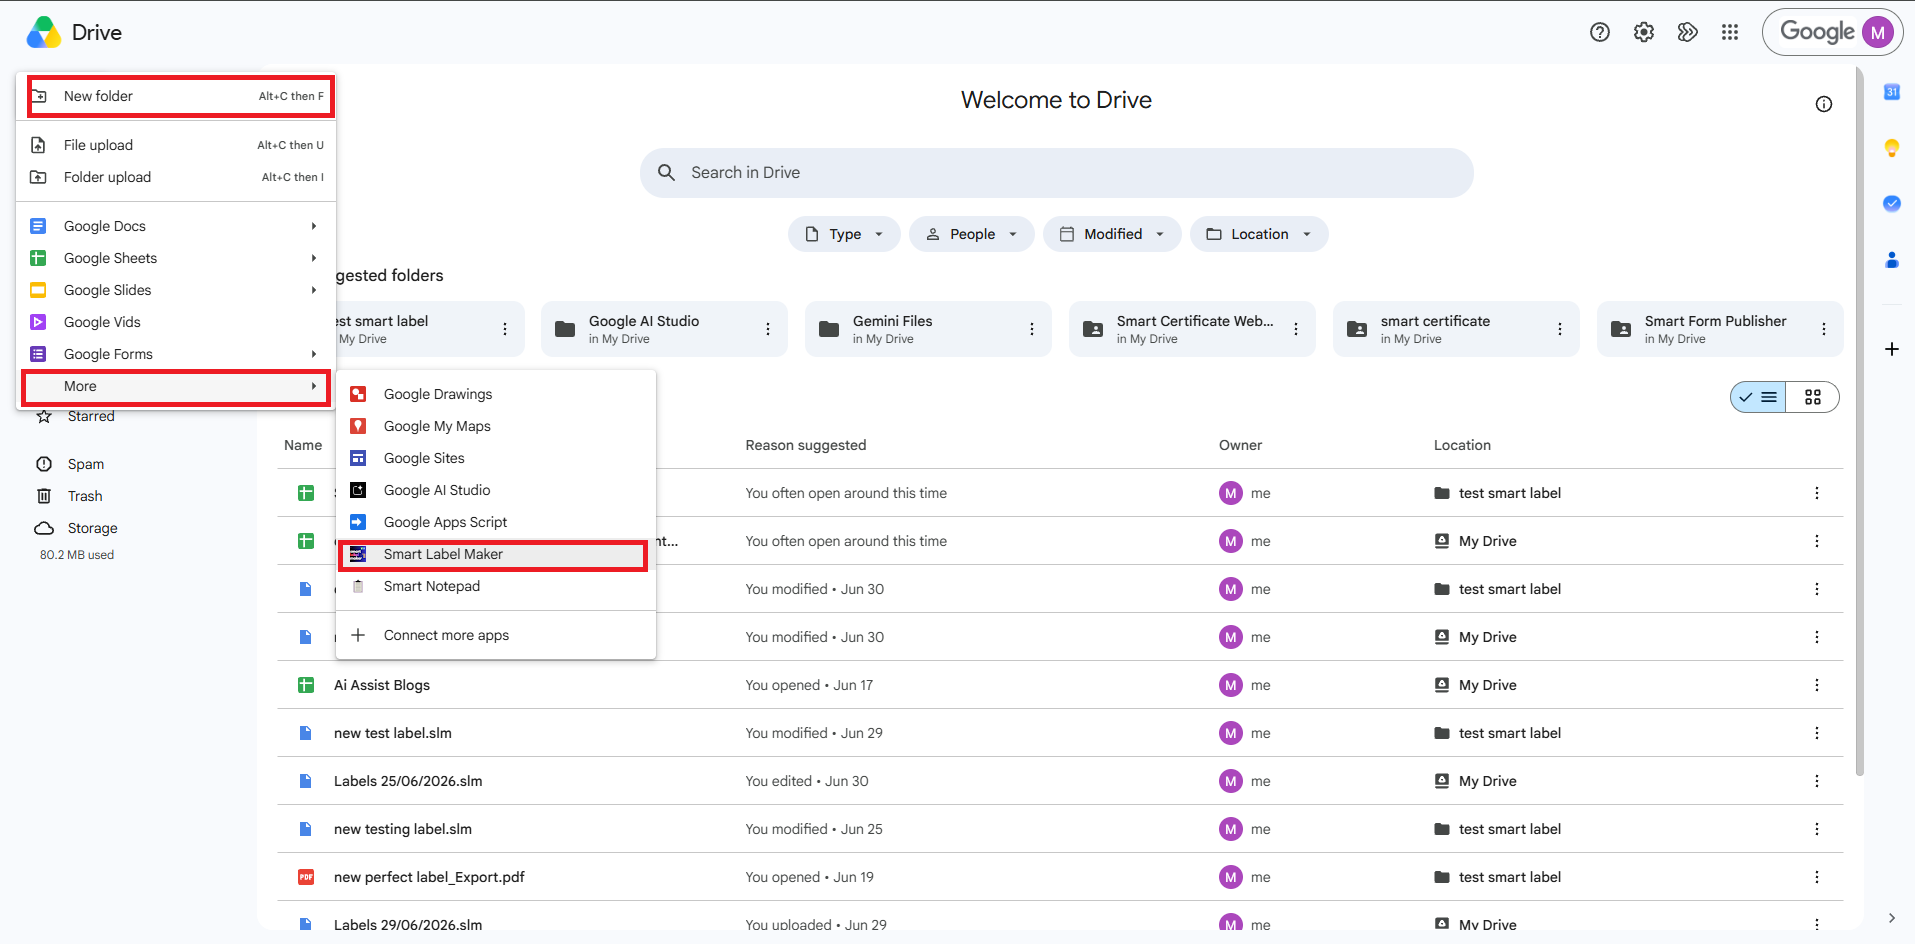
2. Select a template
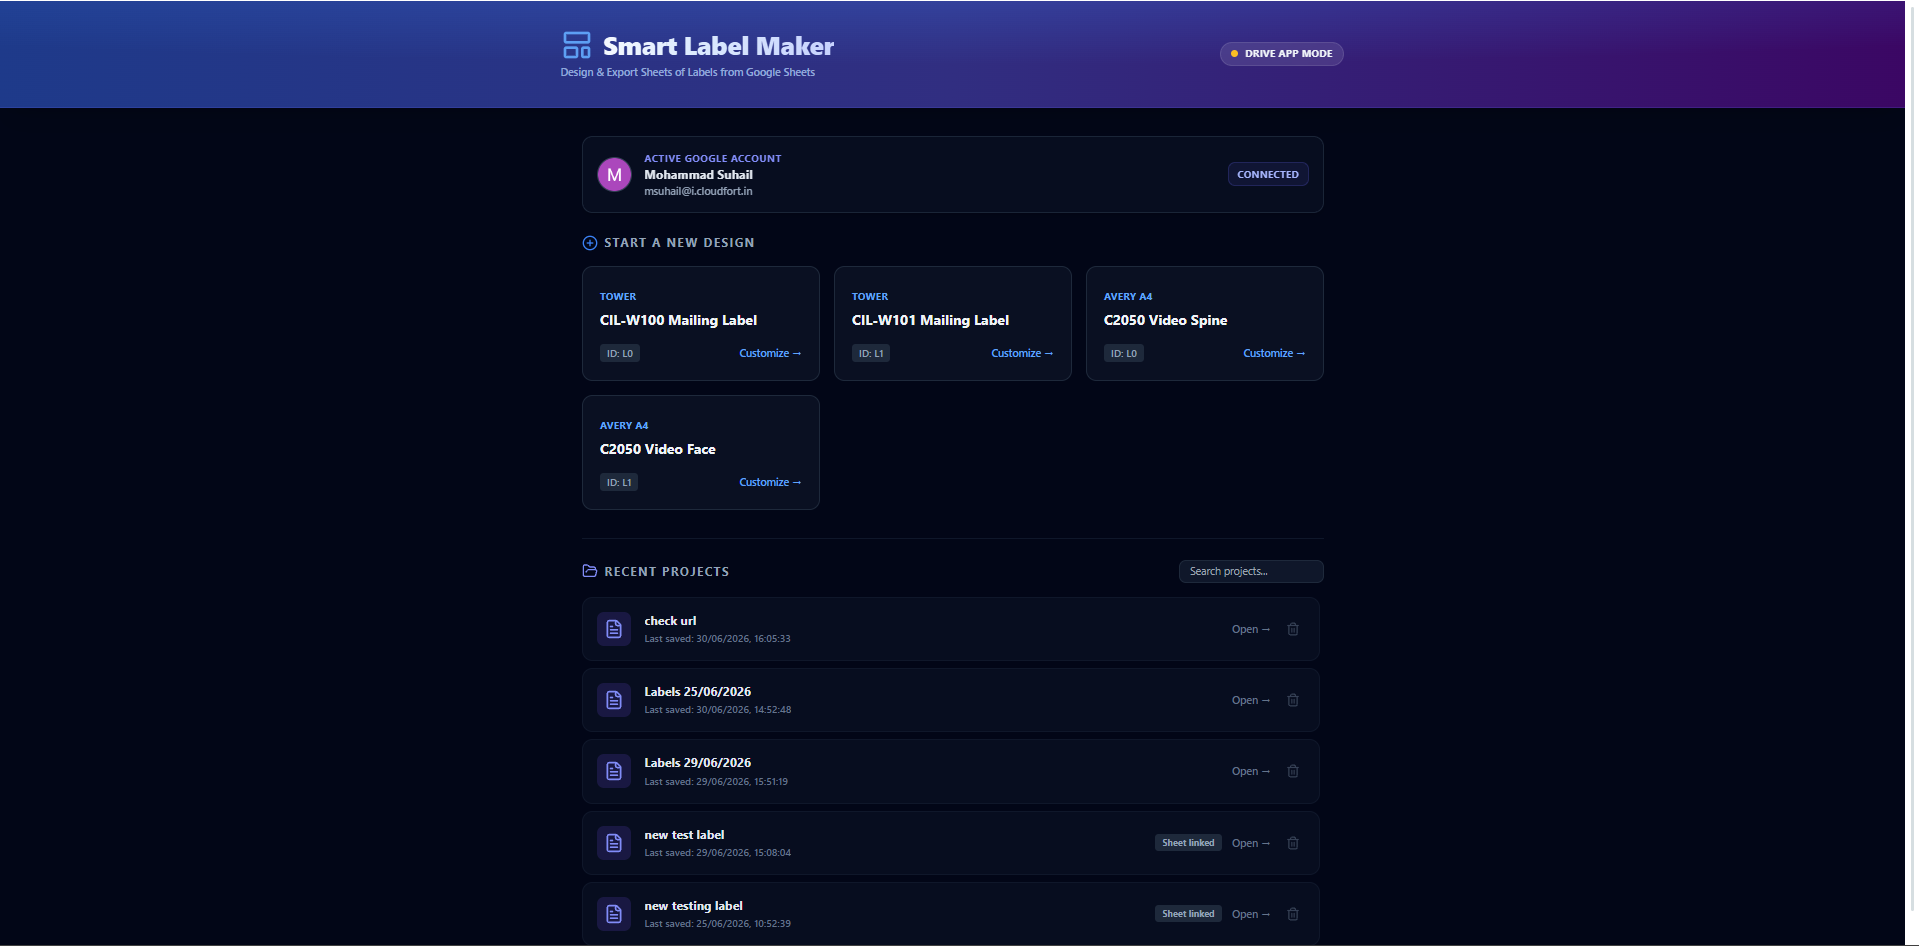
On the dashboard, click any template card from the Start a New Design grid. Choose the template that matches your physical label sheet — for example Avery 5160 is a common choice for contact and address labels on US Letter paper.
Over 5000+ templates are available across Avery® US Letter, Avery® A4, Avery® Zweckform, and Herma. If none match your sheet, click Create in the Setup panel to enter your own custom dimensions.
3. Connect your spreadsheet
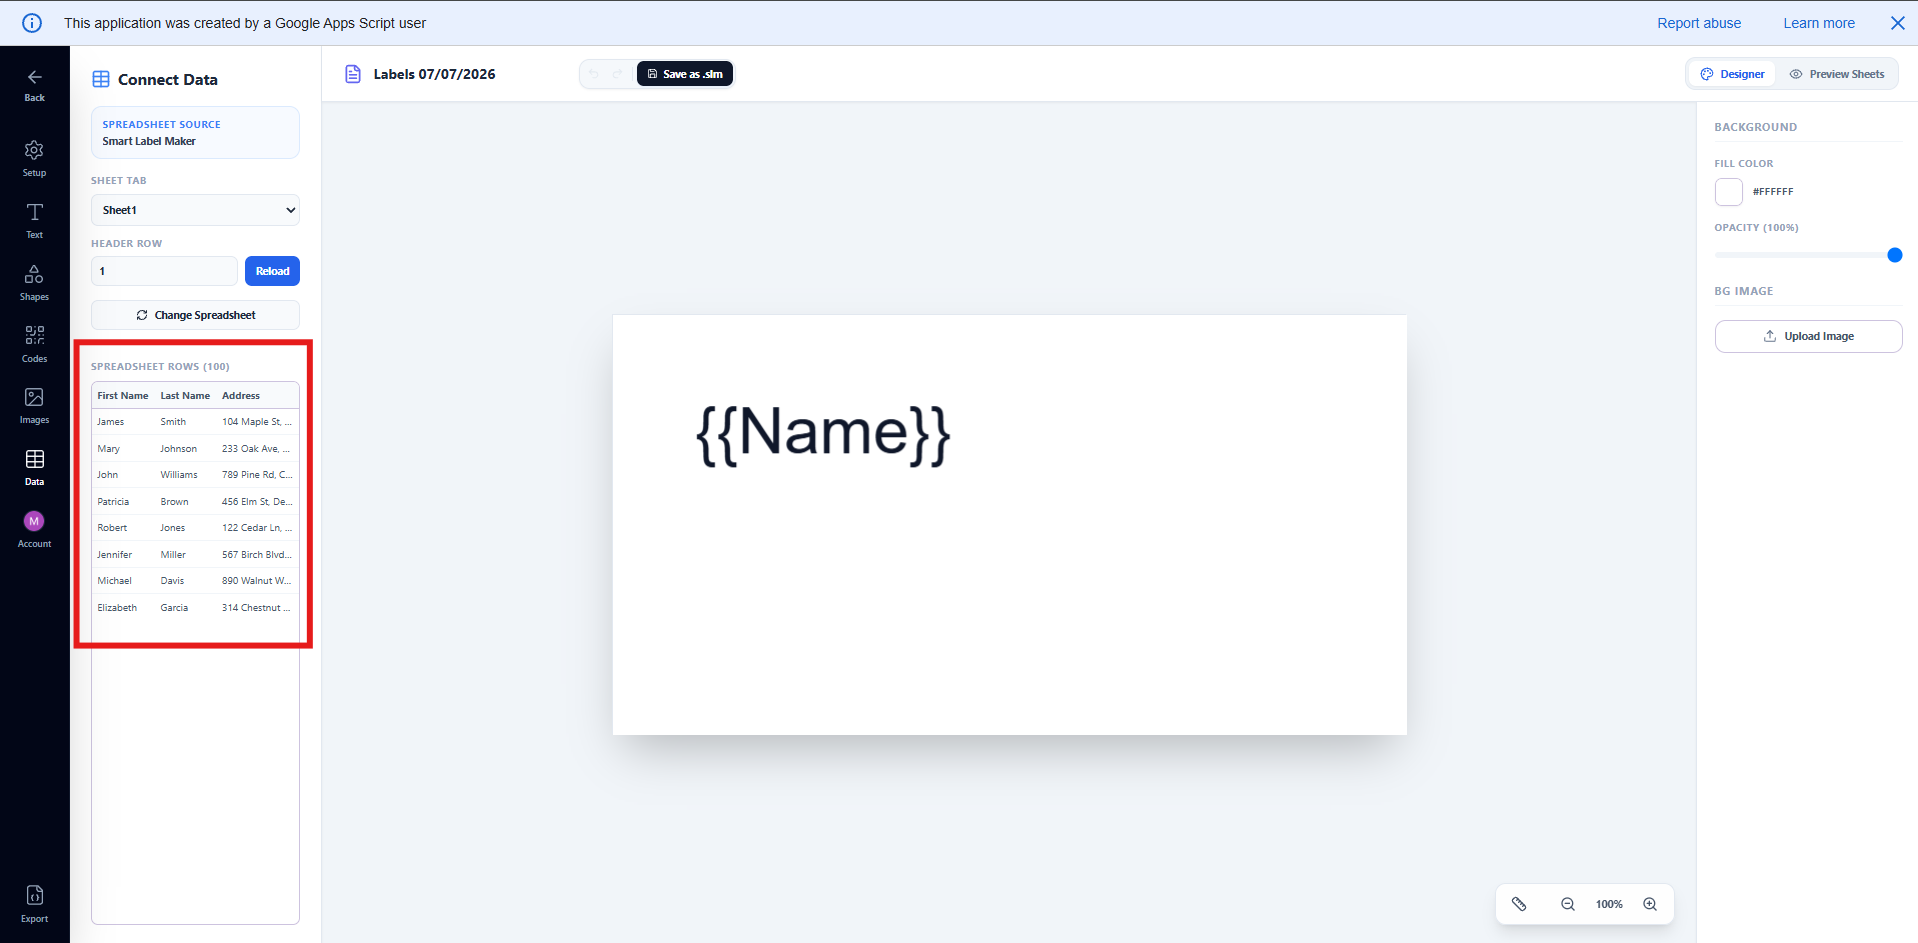
Before adding any text to the label you need to connect your spreadsheet so that Smart Label Maker can read your column headers as merge fields.
Click the Data tab in the left sidebar.
- If you opened from Google Sheets — your spreadsheet is already connected automatically. You will see your spreadsheet name and a preview of your rows. No action needed.
- If you opened from Google Drive — click Select Spreadsheet, choose your Google Sheet from the file picker, and Smart Label Maker will load your columns and rows.
Once connected you should see your column headers — FirstName, Phone, and Address — listed and ready to use.
4. Add the name
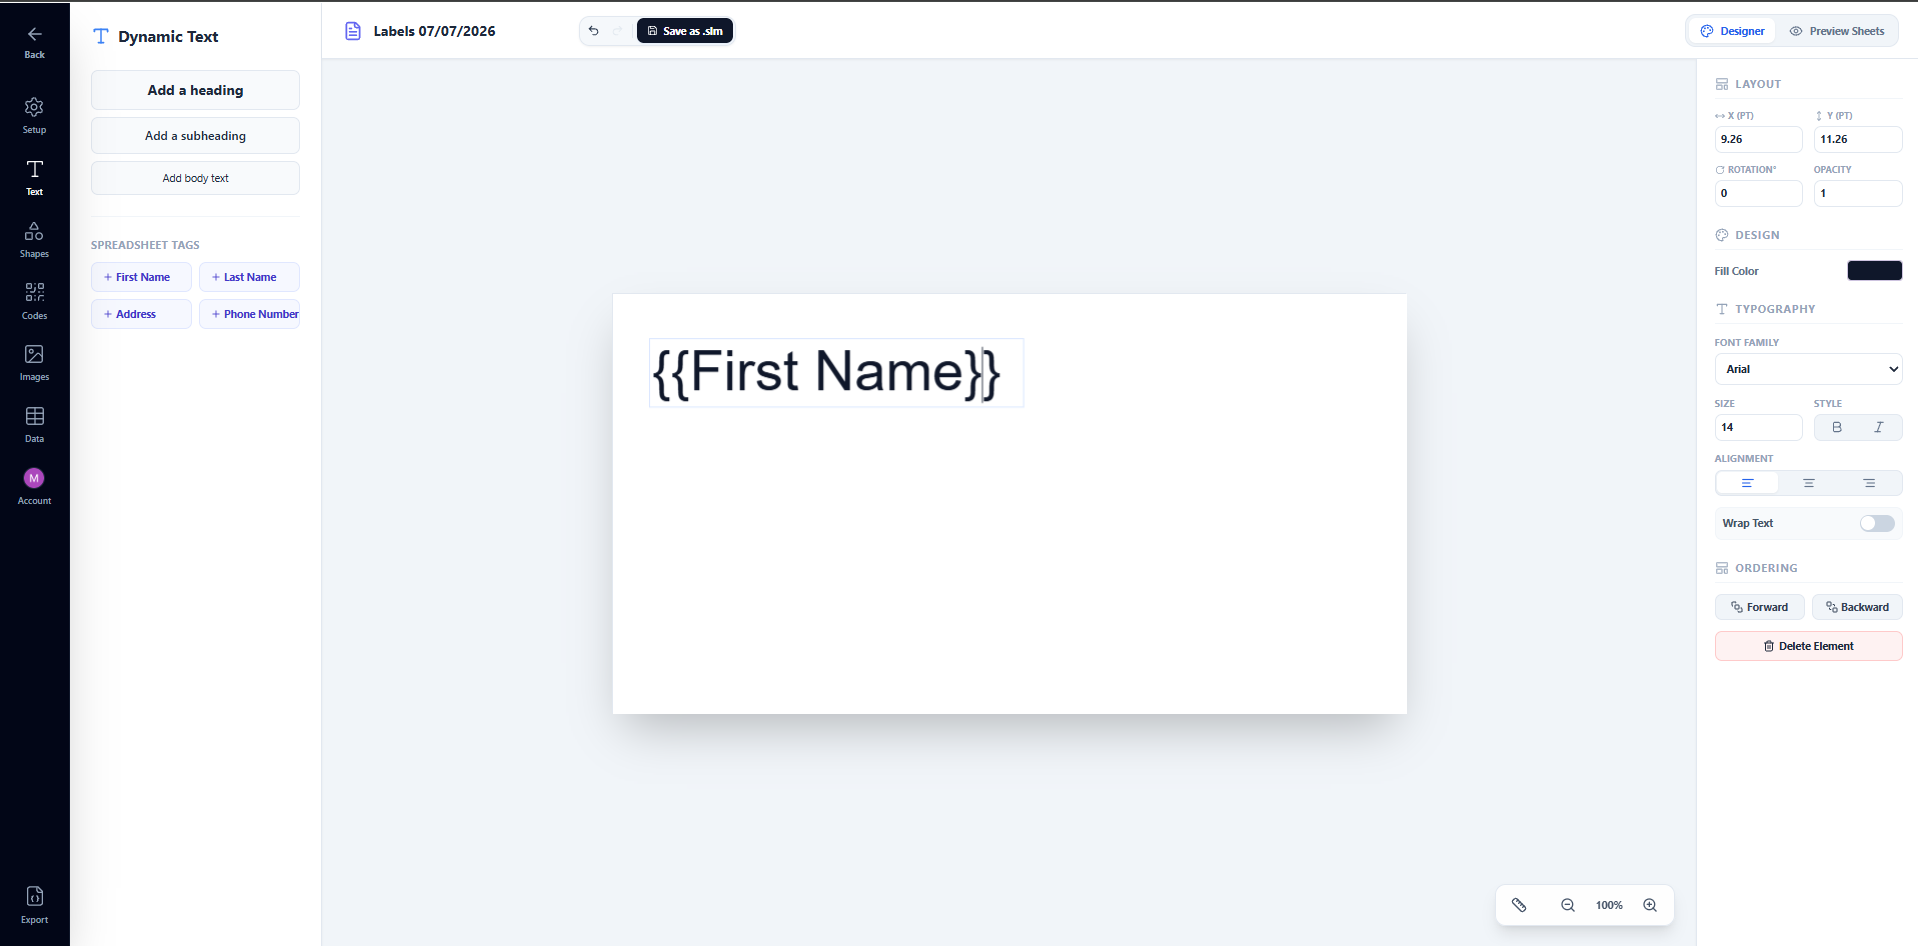
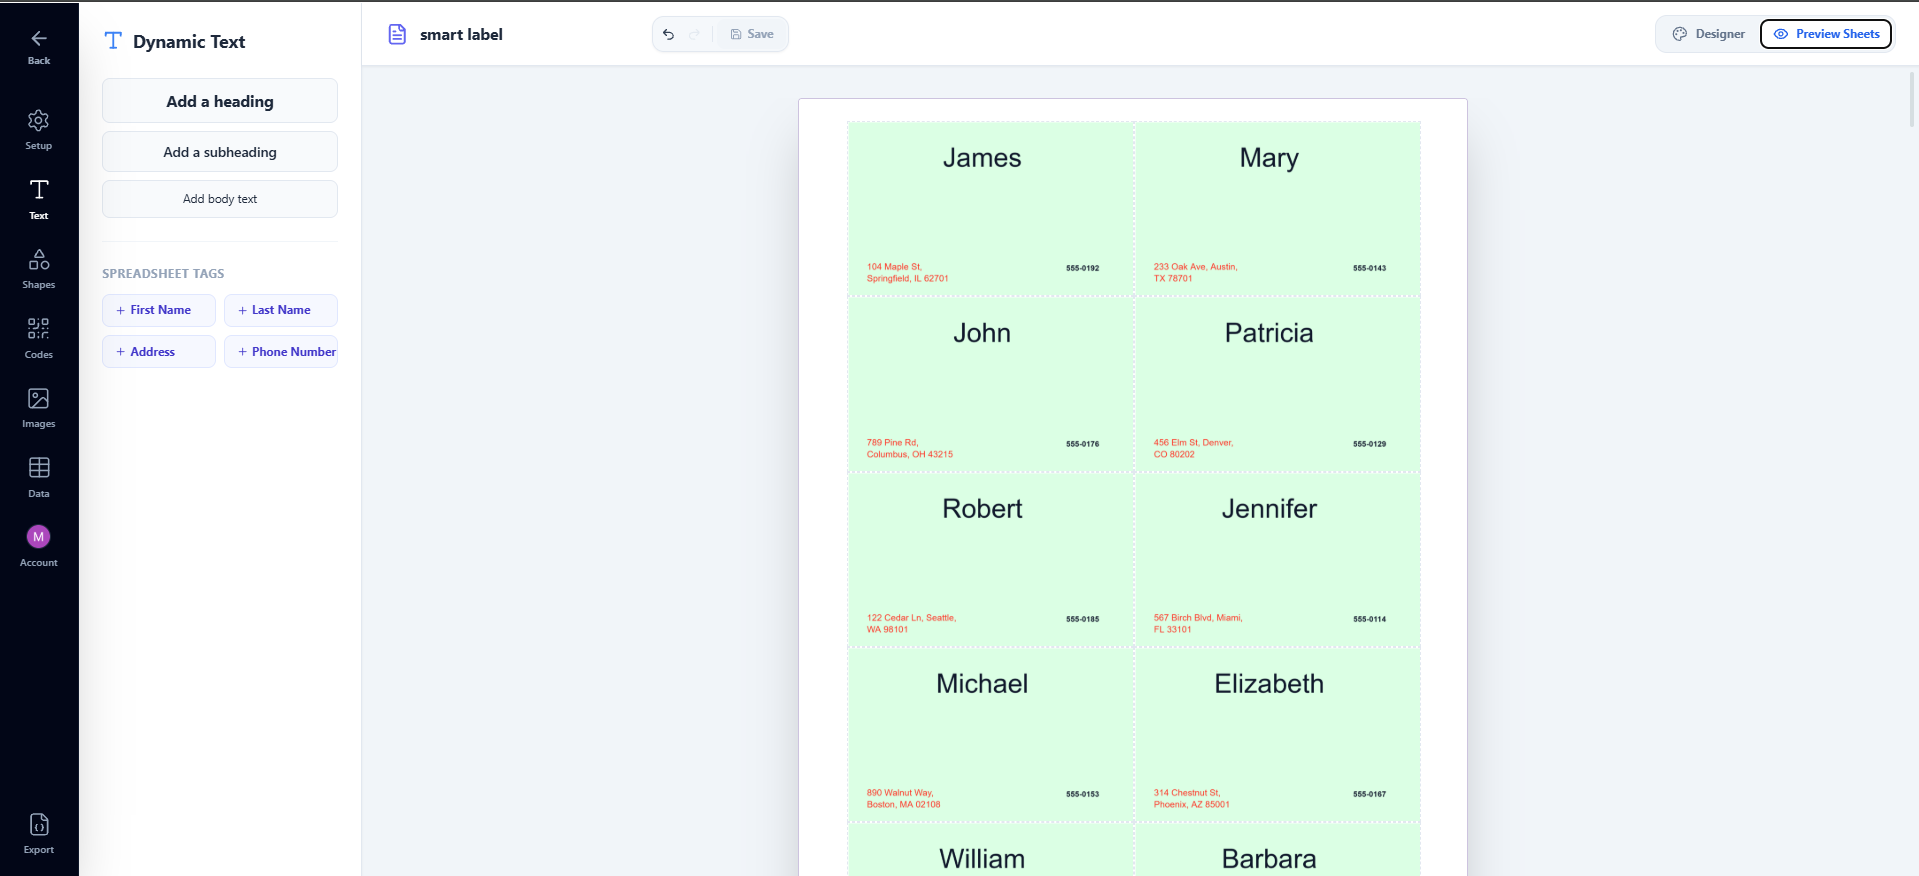
Click the Text tab in the left sidebar. Under the Spreadsheet Tags section you will see a button for each column header from your sheet. Click the FirstName button to insert it as a merge field on the canvas.
This places a text box containing {{FirstName}} on the label. When the PDF
is generated, Smart Label Maker replaces {{FirstName}} with the actual
value from that column for each row — so each label gets the correct name
automatically.
In the right panel, set the font size so the name is prominent but still fits within the label boundary. Bold is recommended so the name stands out clearly from the other lines.
5. Add the address
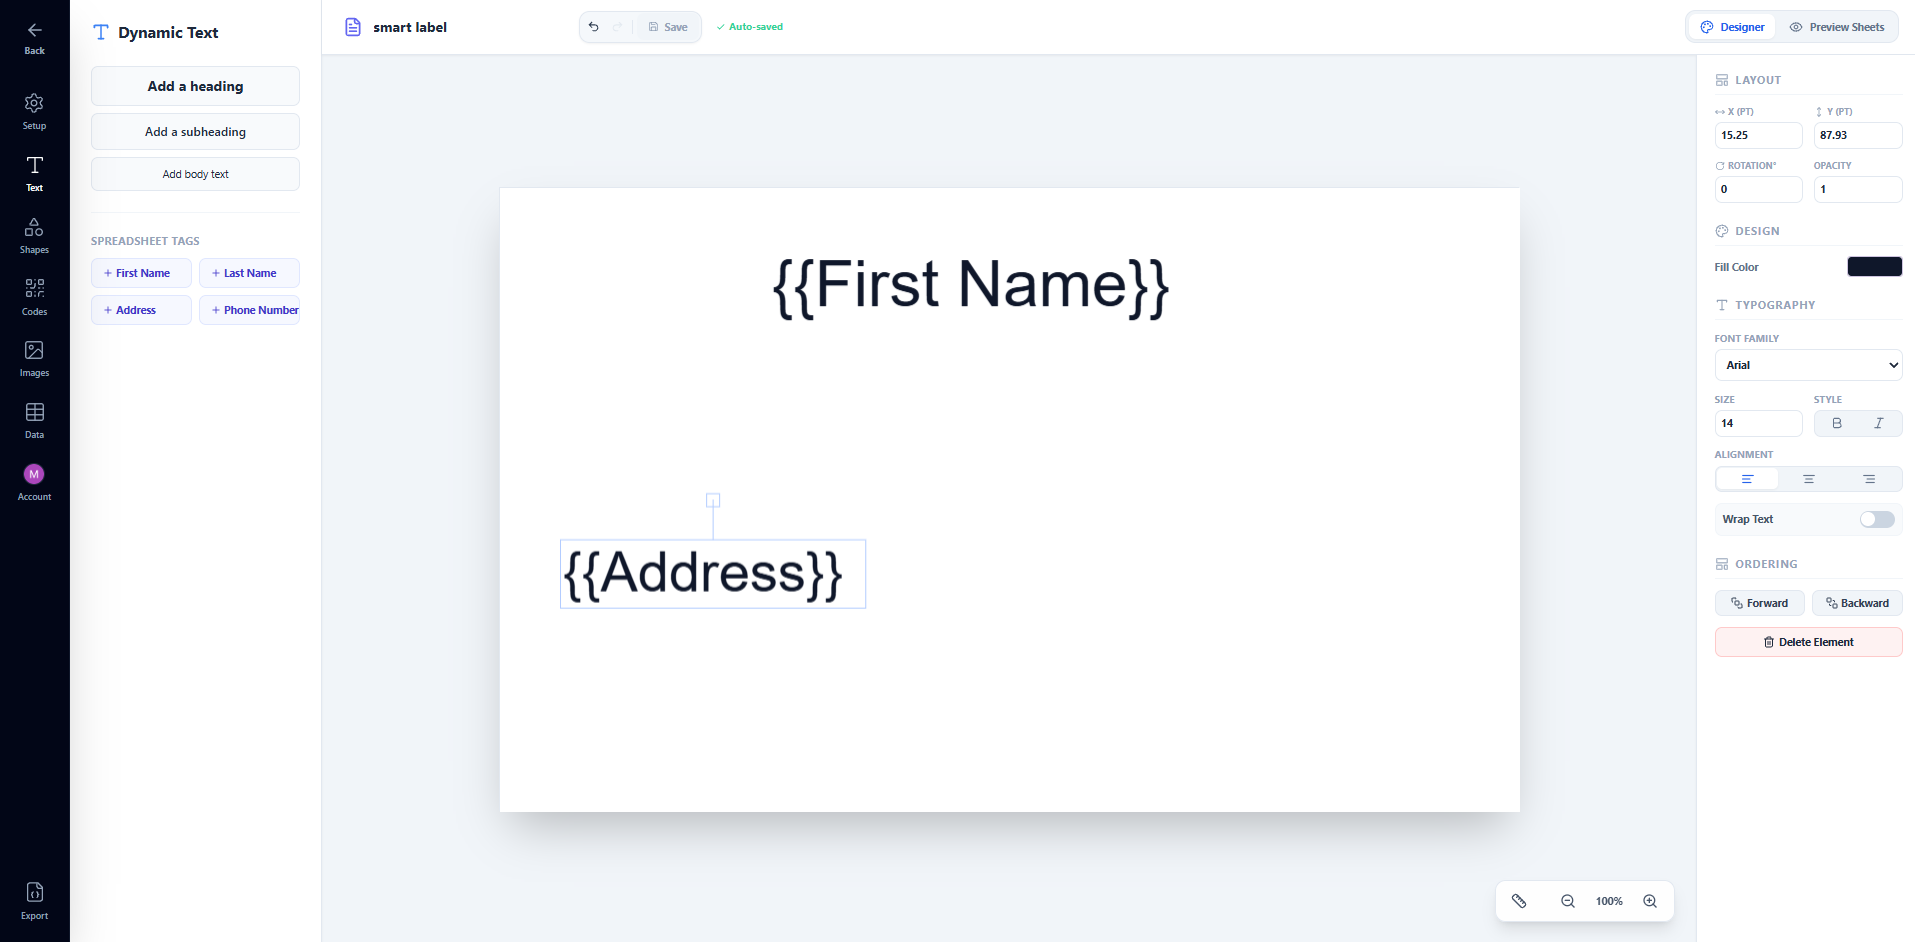
In the Text tab under Spreadsheet Tags, click the Address button
to insert a third merge field. This places a text box containing {{Address}}
on the label.
In the right panel, enable Wrap Text so the address wraps naturally within the label width if the value is long. Set the font size to match the phone number — around 10 or 11 pt.
Drag the address text box to position it below the phone number on the canvas.
6. Add the phone number
In the Text tab under Spreadsheet Tags, click the Phone button
to insert a second merge field on the canvas. This places a text box
containing {{Phone}} on the label.
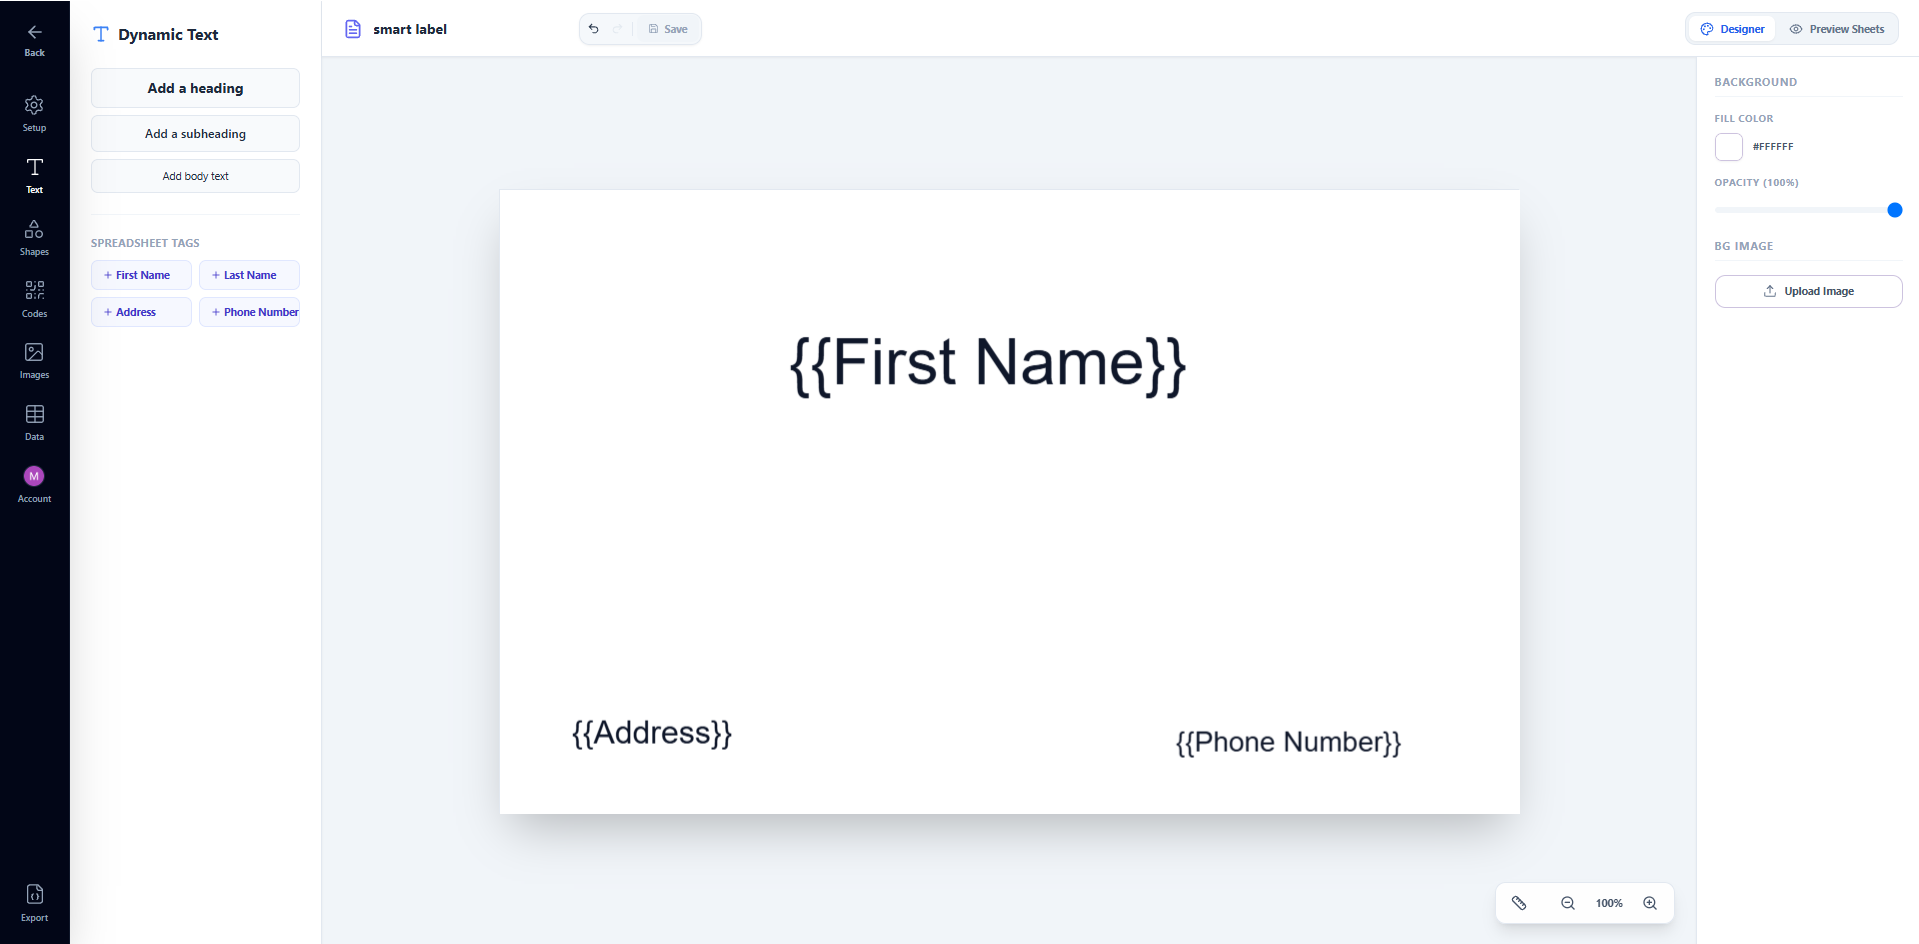
In the right panel, set the font size slightly smaller than the name — around 10 or 11 pt works well for most label sizes. Drag the text box to position it directly below the name on the canvas.
7. Arrange and style
Now that all three merge fields are on the canvas, tidy up the layout:
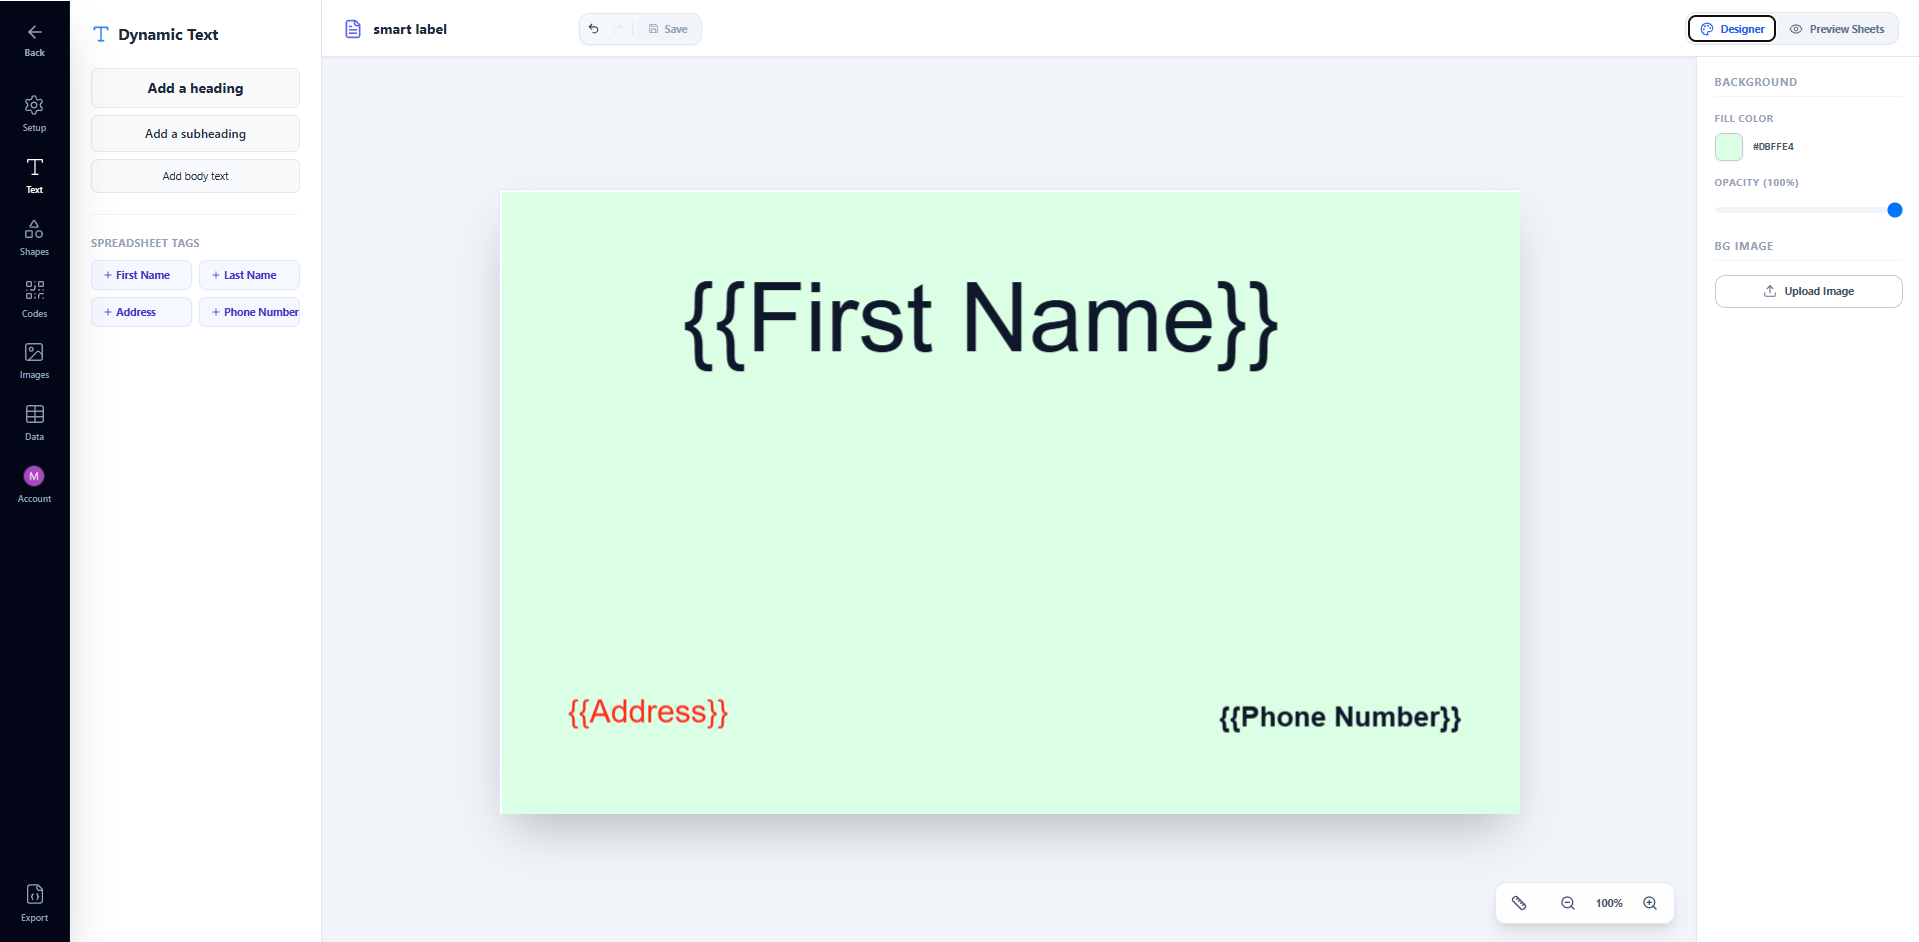
- Alignment — select each text box and use the alignment buttons in the right panel to align all text consistently to the left, center, or right.
- Spacing — drag the text boxes so there is even spacing between the name, phone number, and address lines.
- Color — use the fill color picker in the right panel to change the text color of any element if needed.
- Margins — make sure no text box extends beyond the label boundary shown on the canvas, otherwise it will be clipped in the final PDF.
Your finished label design should look something like this on the canvas:
8. Preview your labels
Click Preview Sheets in the top bar to switch to a live full-page preview. Smart Label Maker merges your spreadsheet data in real time and renders every label with the actual name, phone number, and address from each row — exactly as they will appear in the final PDF.
Scroll through all pages to confirm every label looks correct. Click Designer in the top bar to return and make any adjustments.
9. Generate PDF
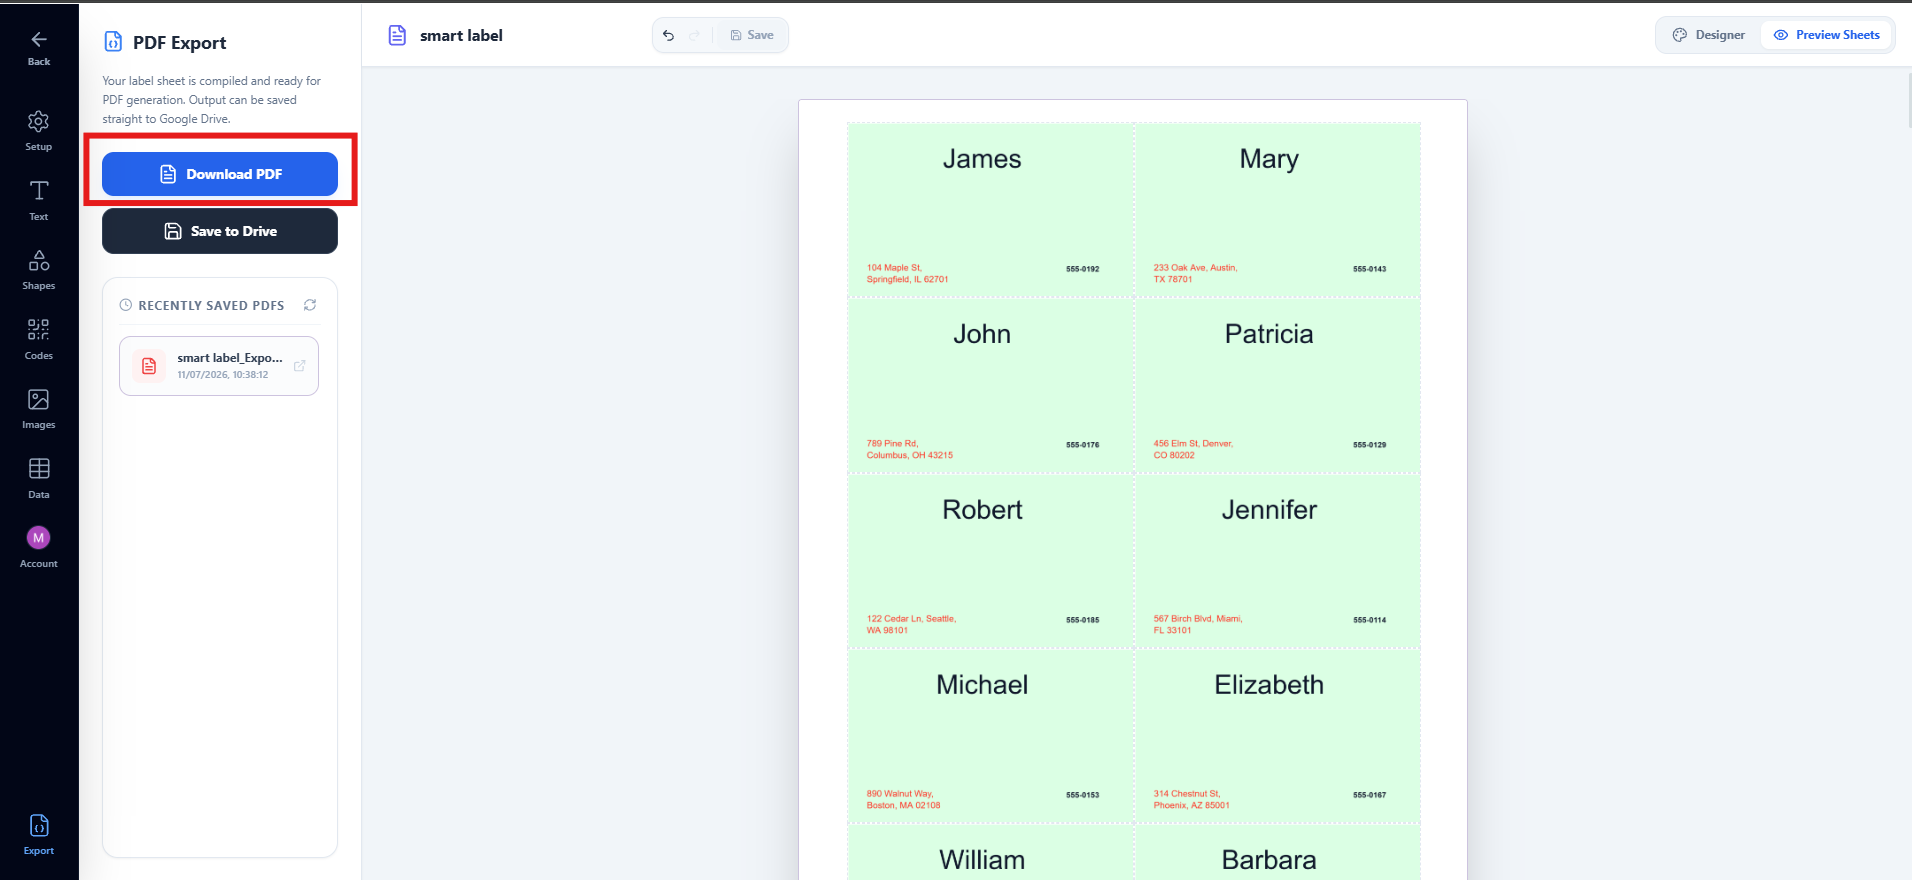
Click the Export tab in the left sidebar. You have two options:
Download PDF — generates the complete merged label sheet and downloads it directly to your computer.
Save to Drive — generates the PDF and saves it to your Google Drive with an instant access link.
Smart Label Maker will process every row in your spreadsheet and produce as many pages as needed to fit all your records.
Free plan note: Free accounts are limited to 20 labels per export and 3 exports per day. Upgrade to Pro for unlimited labels and exports.
10. Print labels
Open the downloaded or Drive-saved PDF and click File → Print. In the print dialog make sure to:
- Set scale to 100% or Actual Size — never use Fit to page
- Set margins to None
- Confirm the paper size matches your label sheet (e.g. US Letter or A4)
Load your label sheet into the printer and print. Each label will contain the name, phone number, and address for the corresponding row in your spreadsheet.