How to make labels in Google Sheets?
This tutorial shows you how to create and print a full sheet of labels using our add-on called Smart Label Maker. You can use it directly inside Google Sheets, or as a standalone web app from Google Drive. As well as many other guides and tutorials depending on your use case.
Here is a summary of this step-by-step guide:
- Open a spreadsheet
- Open Smart Label Maker
- Select a template
- Connect your spreadsheet data
- Design your label
- Preview your labels
- Generate PDF
- Print labels
1. Open a spreadsheet
Open a new Google Sheets.
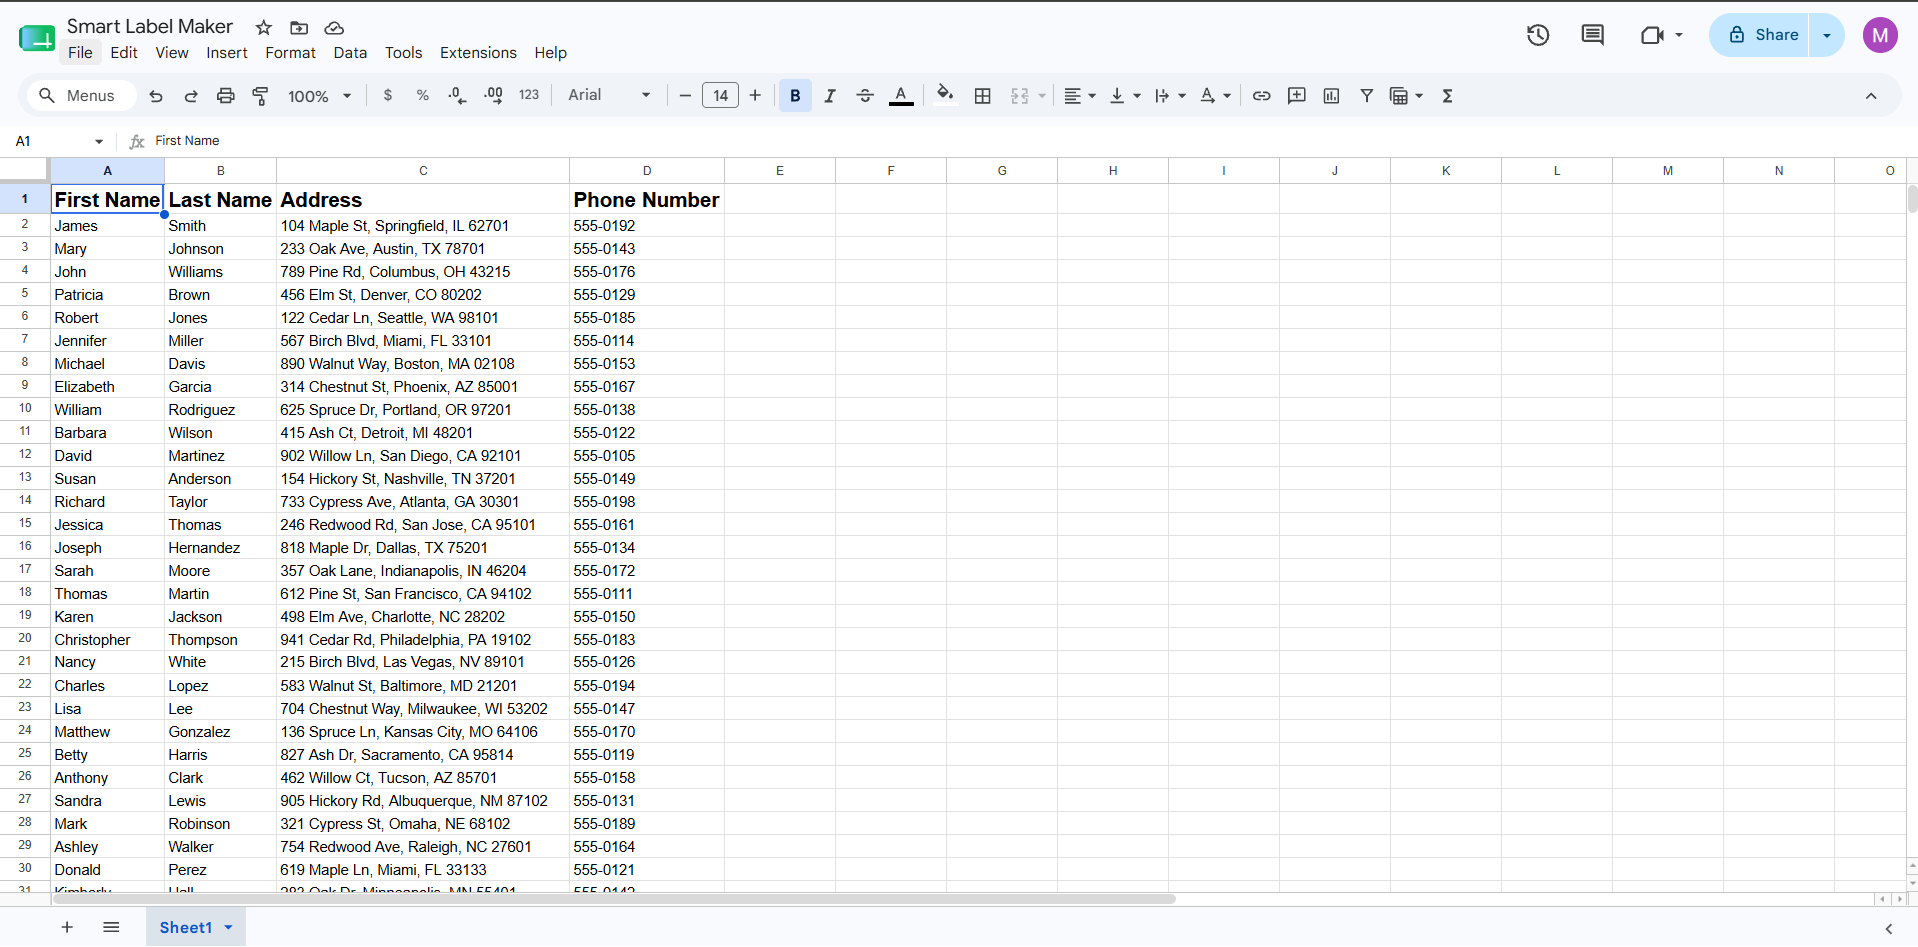
If you have a mailing list or a list of items to print labels for, open that
spreadsheet. Smart Label Maker will read your sheet’s column headers as merge
fields that you can insert into your label design — for example {{Name}},
{{Address}}, or {{SKU}}.
Make sure your spreadsheet has a clear header row as the first row, with one column per field you want to merge into your labels.
2. Open Smart Label Maker
There are two ways to open Smart Label Maker, and the way you open it determines how your spreadsheet gets connected.
Option A — From Google Sheets (add-on mode)
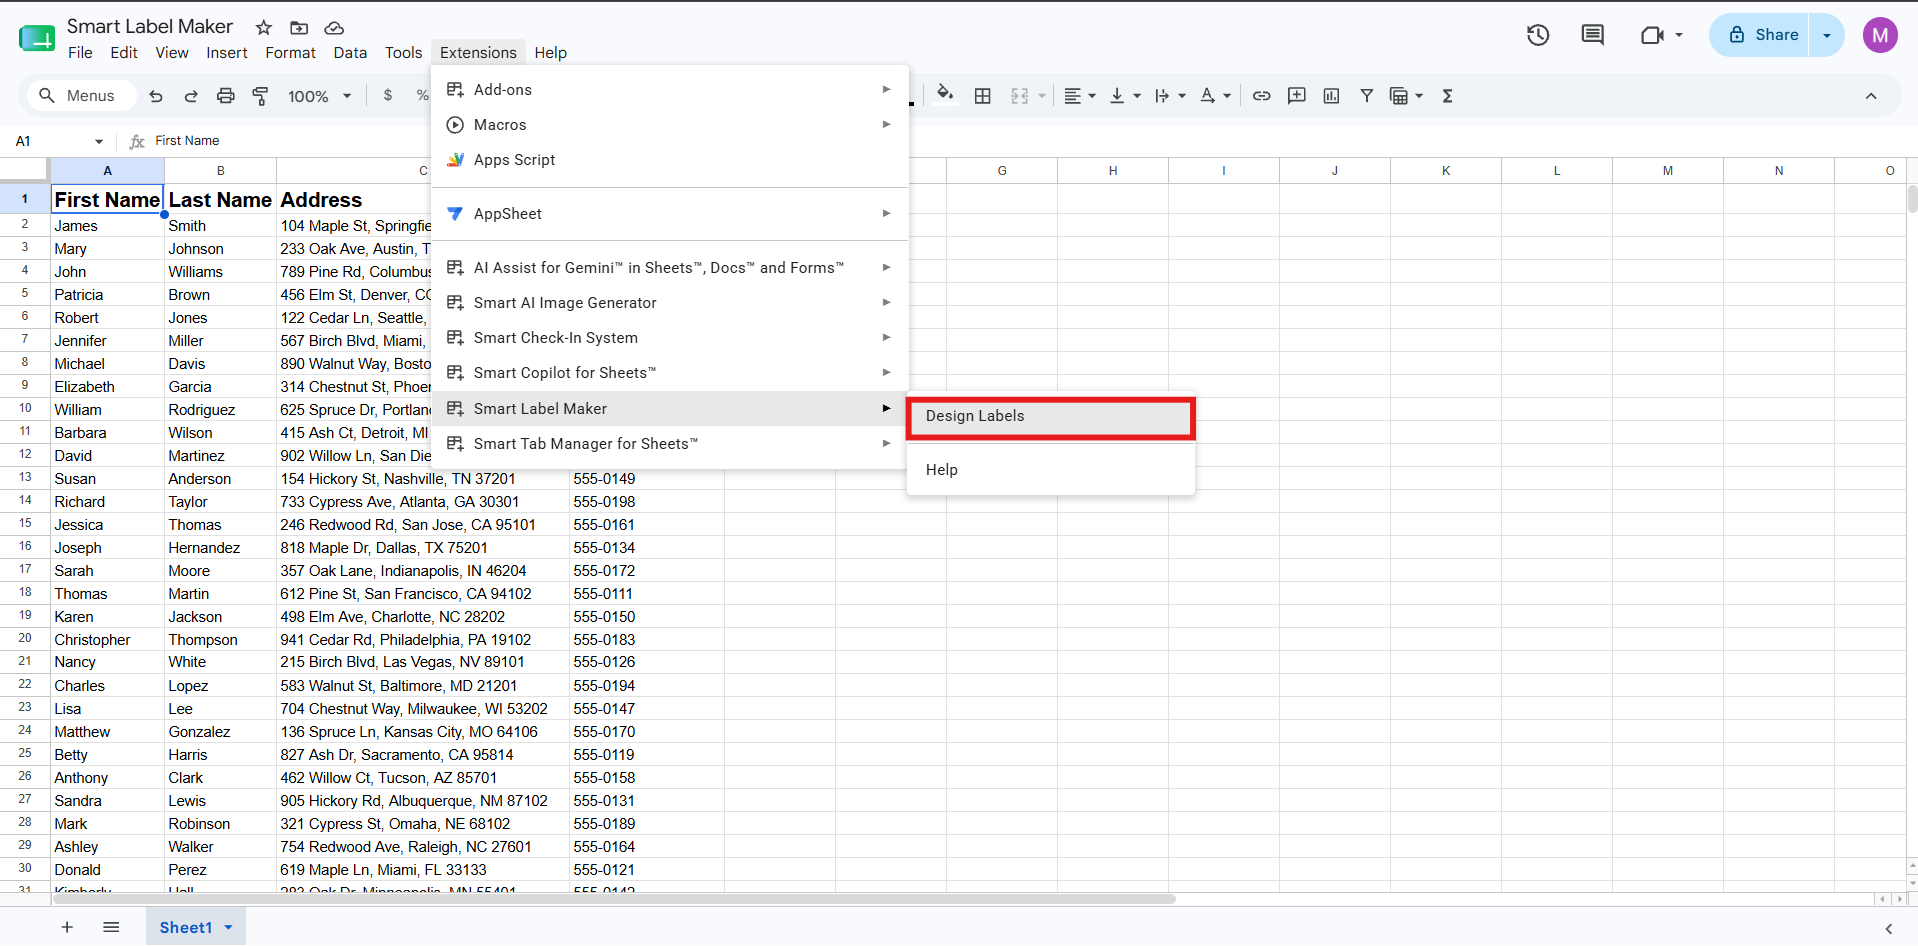
In Google Sheets, click the Extensions menu, then select Smart Label Maker → Design Labels. If you have not installed the add-on yet, install it first from the Google Workspace Marketplace.
Smart Label Maker opens as a full-screen dialog directly inside your Google Sheets window. Your active spreadsheet is automatically connected — Smart Label Maker immediately reads your sheet’s columns and data with no extra steps required.
Option B — From Google Drive (standalone mode)
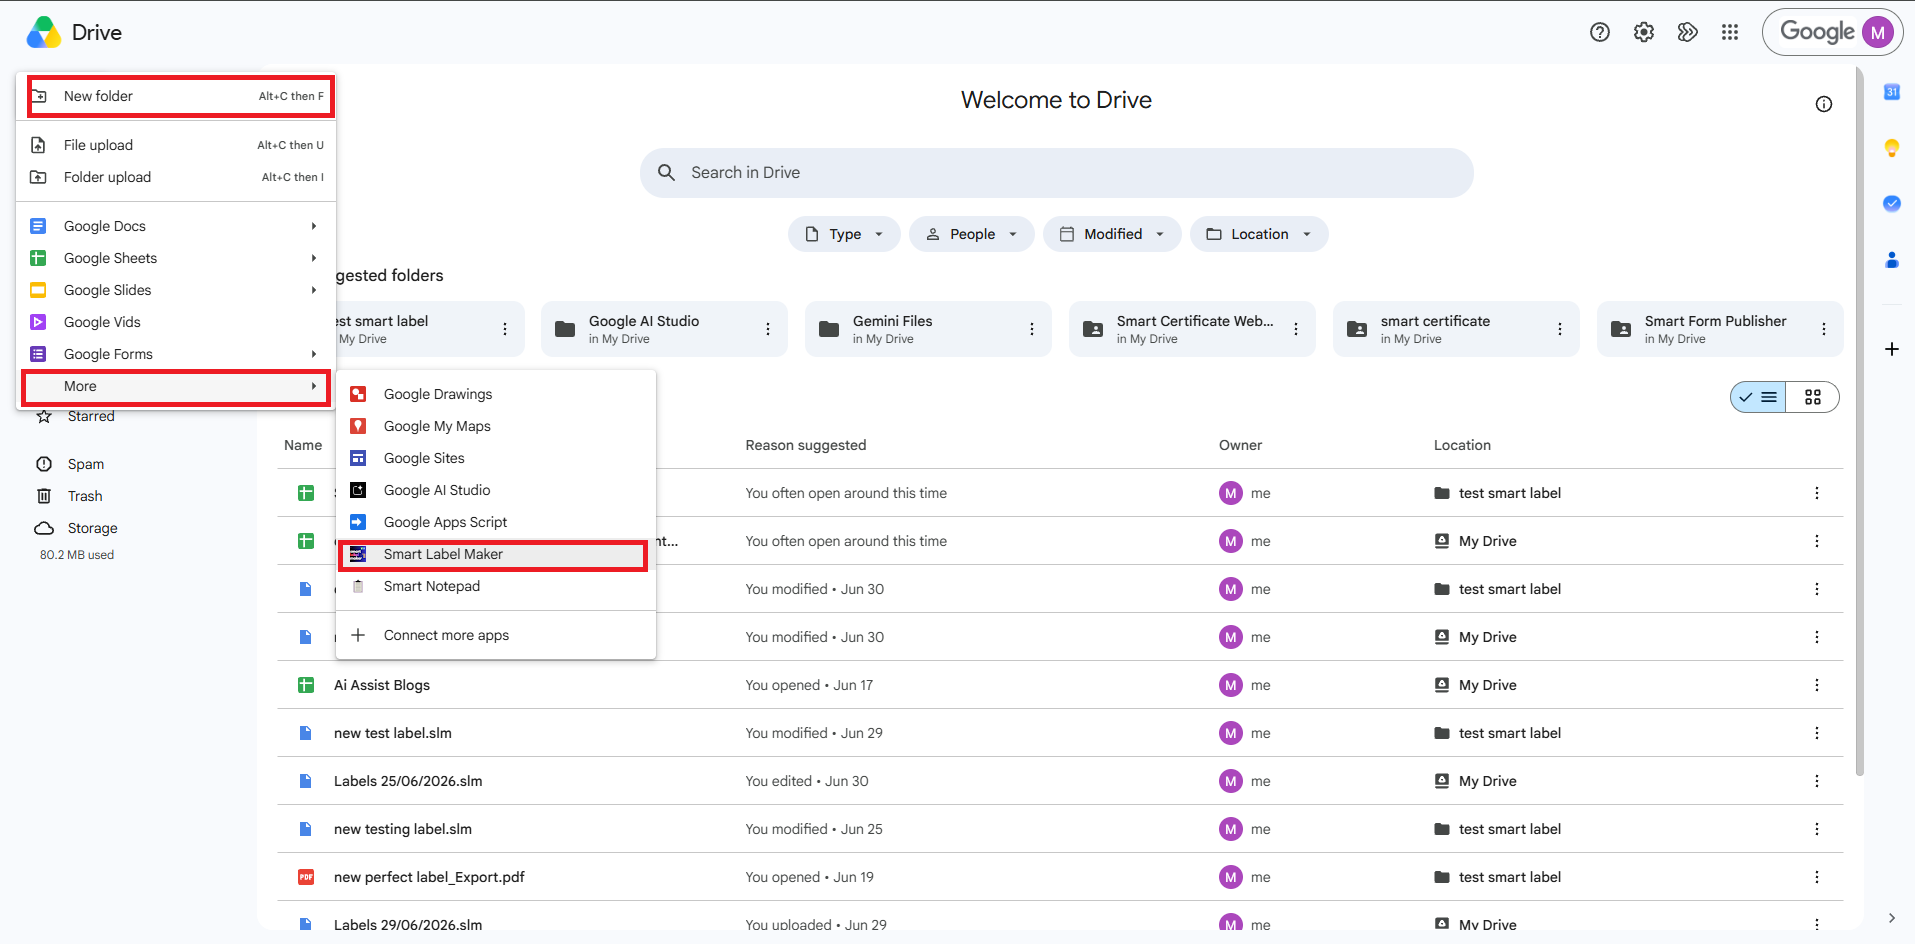
Open Google Drive and either:
- Click New → More → Smart Label Maker to start a fresh project, or
- Double-click an existing
.slmproject file to reopen a saved design.
Smart Label Maker opens as a standalone web app in your browser. In this mode no spreadsheet is connected by default — you will need to link one manually in Step 4.
3. Select a template
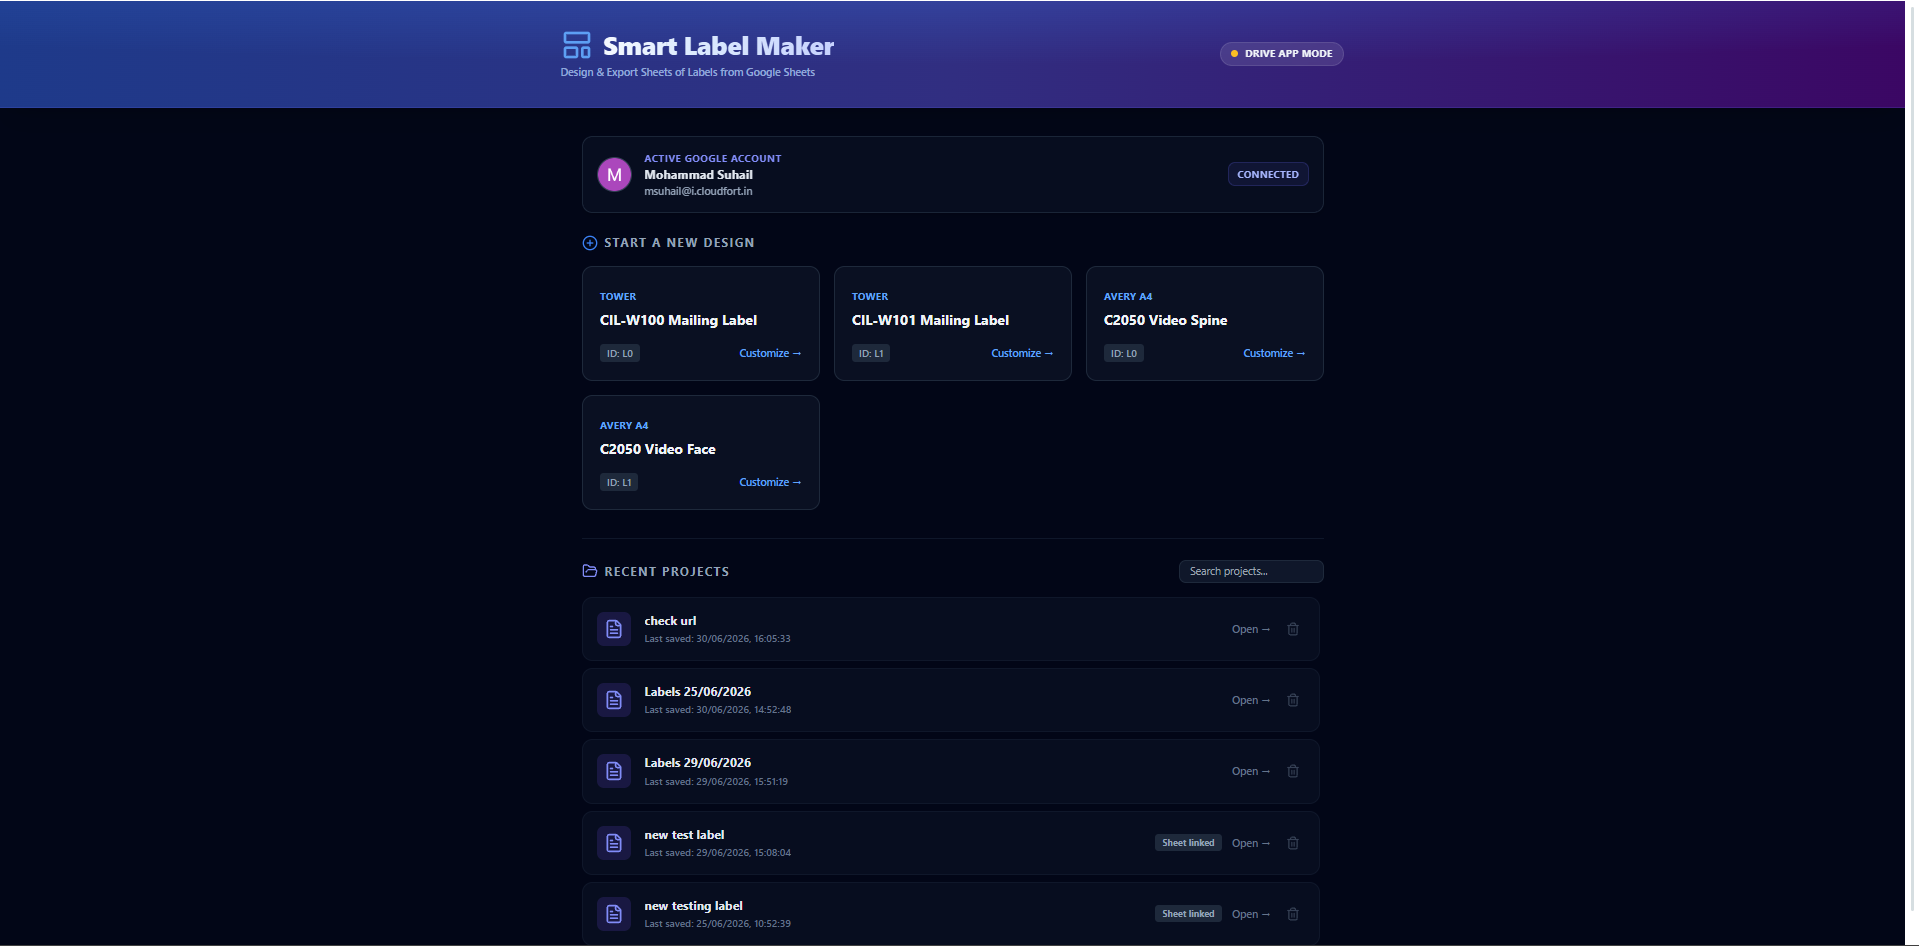
When Smart Label Maker opens you will land on the dashboard. This is where you manage your saved projects and start new designs.
Click any template card from the Start a New Design grid to begin. Over 5000+ label templates are available across multiple categories including Avery® US Letter, Avery® A4, Avery® Zweckform, and Herma. You can also create a fully custom template by entering your own label dimensions using the Create button in the Setup panel.
Your recent projects are listed below the template grid — click any of them to reopen and continue editing where you left off.
4. Connect your spreadsheet data
This step works differently depending on how you opened Smart Label Maker.
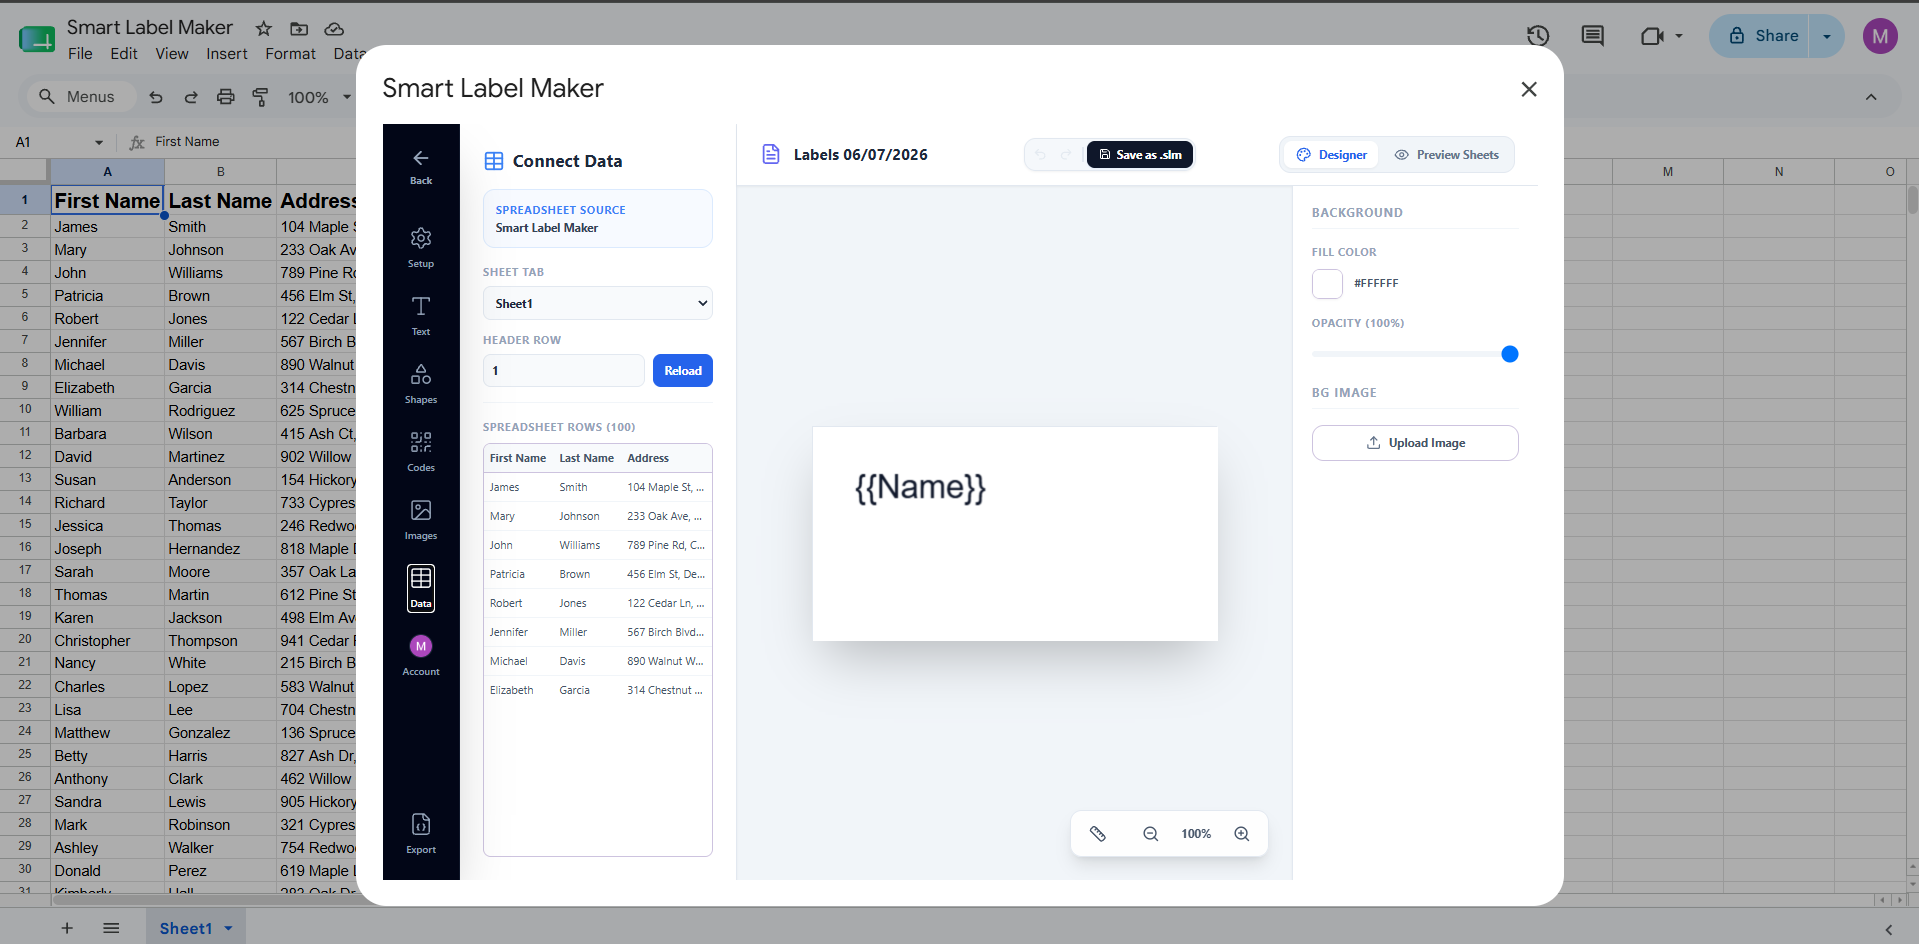
If you opened from Google Sheets (add-on mode)
Your spreadsheet is already linked automatically. You will see the connected spreadsheet name displayed in the Data tab of the left sidebar. Smart Label Maker has already read your column headers and row data — no action needed here.
You can optionally switch to a different sheet tab using the Sheet Tab dropdown, or change which row is treated as the header using the Header Row field, then click Reload.
If you opened from Google Drive (standalone mode)
You need to manually link a spreadsheet. In the designer, click the Data tab in the left sidebar, then click Select Spreadsheet.
A Google file picker will open — browse your Drive and select the Google Sheet you want to use as your data source. Once selected, Smart Label Maker will read the sheet’s columns and rows and display them in the Data tab.
You can then:
- Switch between sheet tabs using the Sheet Tab dropdown
- Change the header row using the Header Row field and clicking Reload
- Click Change Spreadsheet at any time to link a different sheet
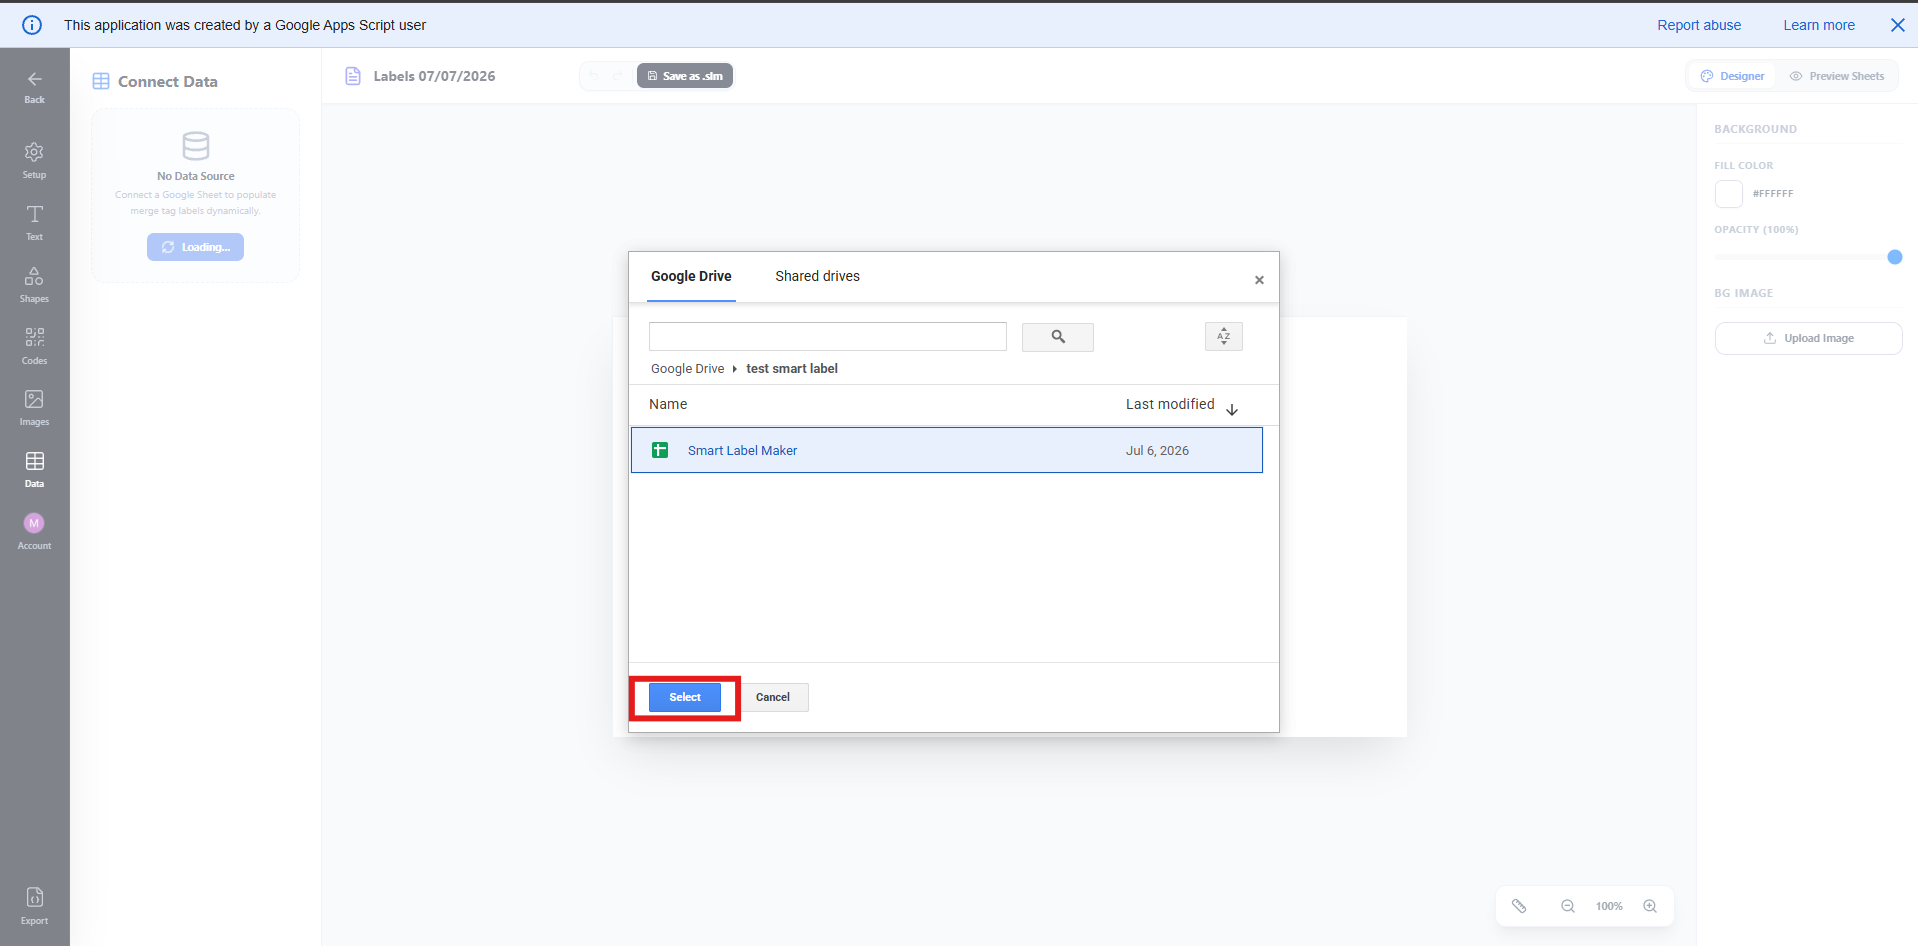
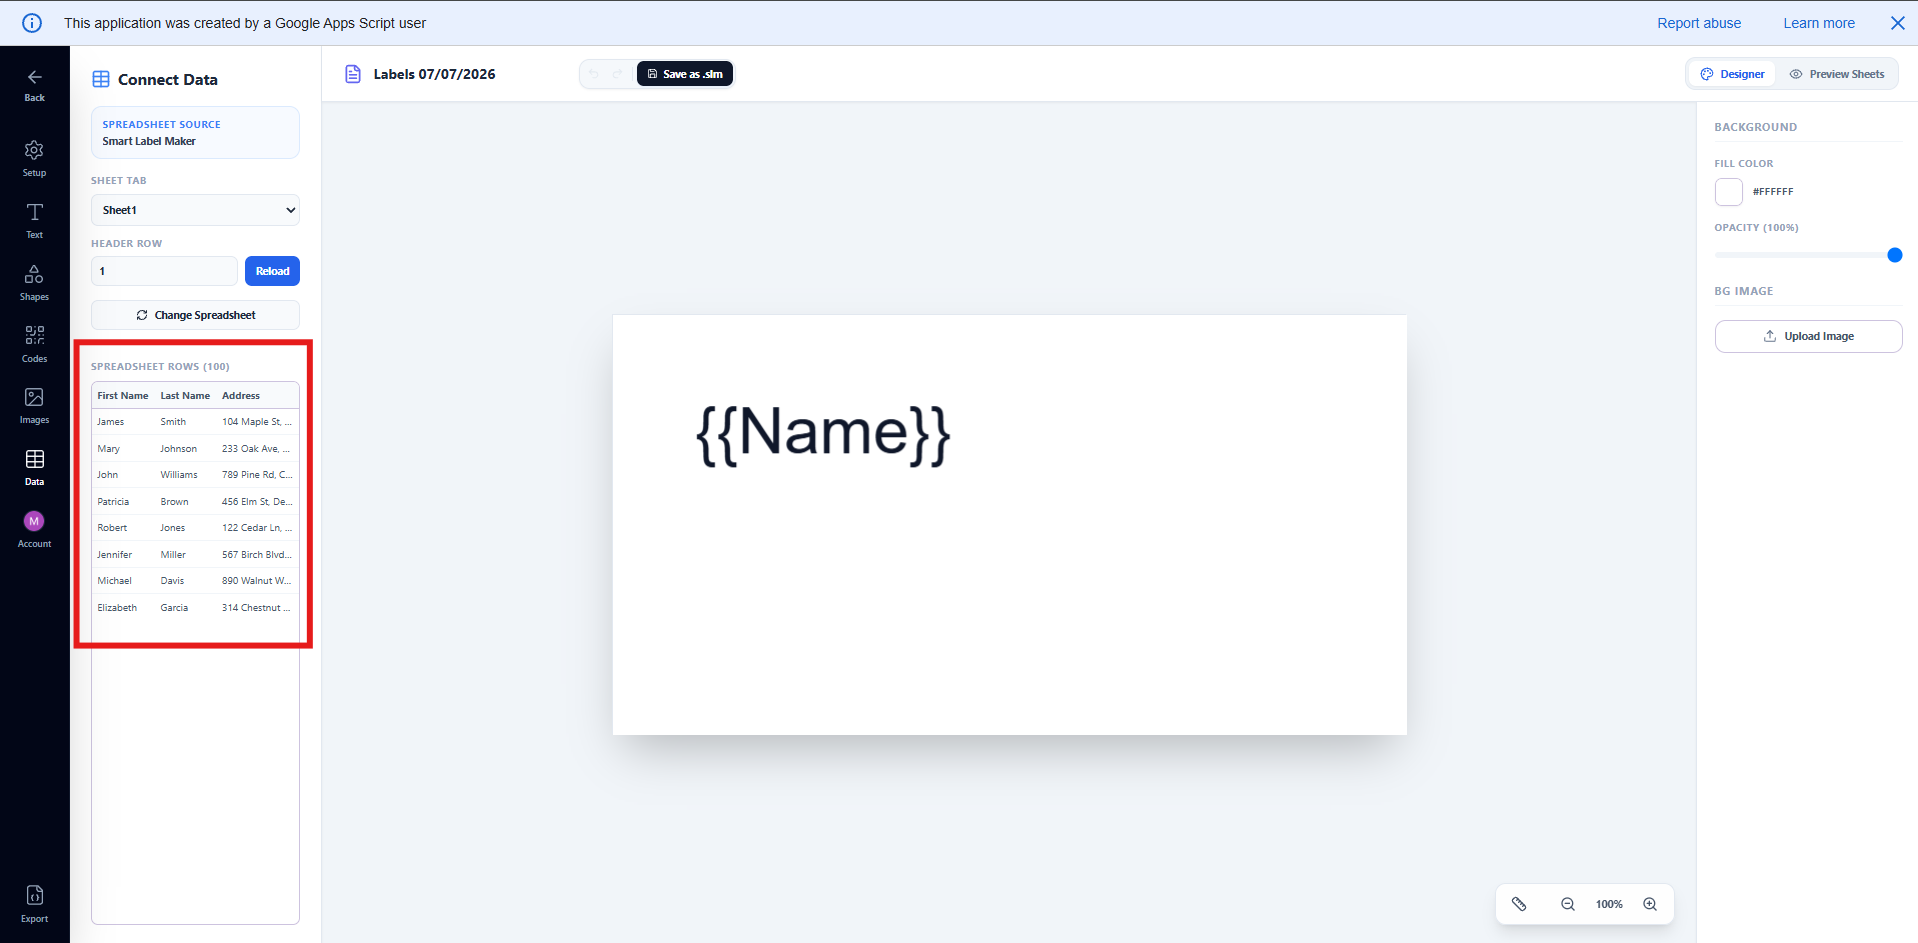
Once your spreadsheet is connected, your column headers will appear as available merge tags in the Text tab, ready to insert into your design.
5. Design your label
After selecting a template, Smart Label Maker opens the full-screen label designer. The designer has three main areas:
- Left sidebar — switch between tools: Setup, Text, Shapes, QR/Barcodes, Images, Data, and Export.
- Canvas — the interactive design area showing a single label at actual size. Click to select elements, drag to move them, and use handles to resize.
- Right panel — context-sensitive properties for whichever element is selected, including position, size, font, color, opacity, and more.
You can place the following elements on your label:
Text — Click the Text tab and choose a heading, subheading, or body
text style. To merge spreadsheet data, click any column name shown under
Spreadsheet Tags to insert it as a merge field like {{FirstName}} directly
onto the canvas.
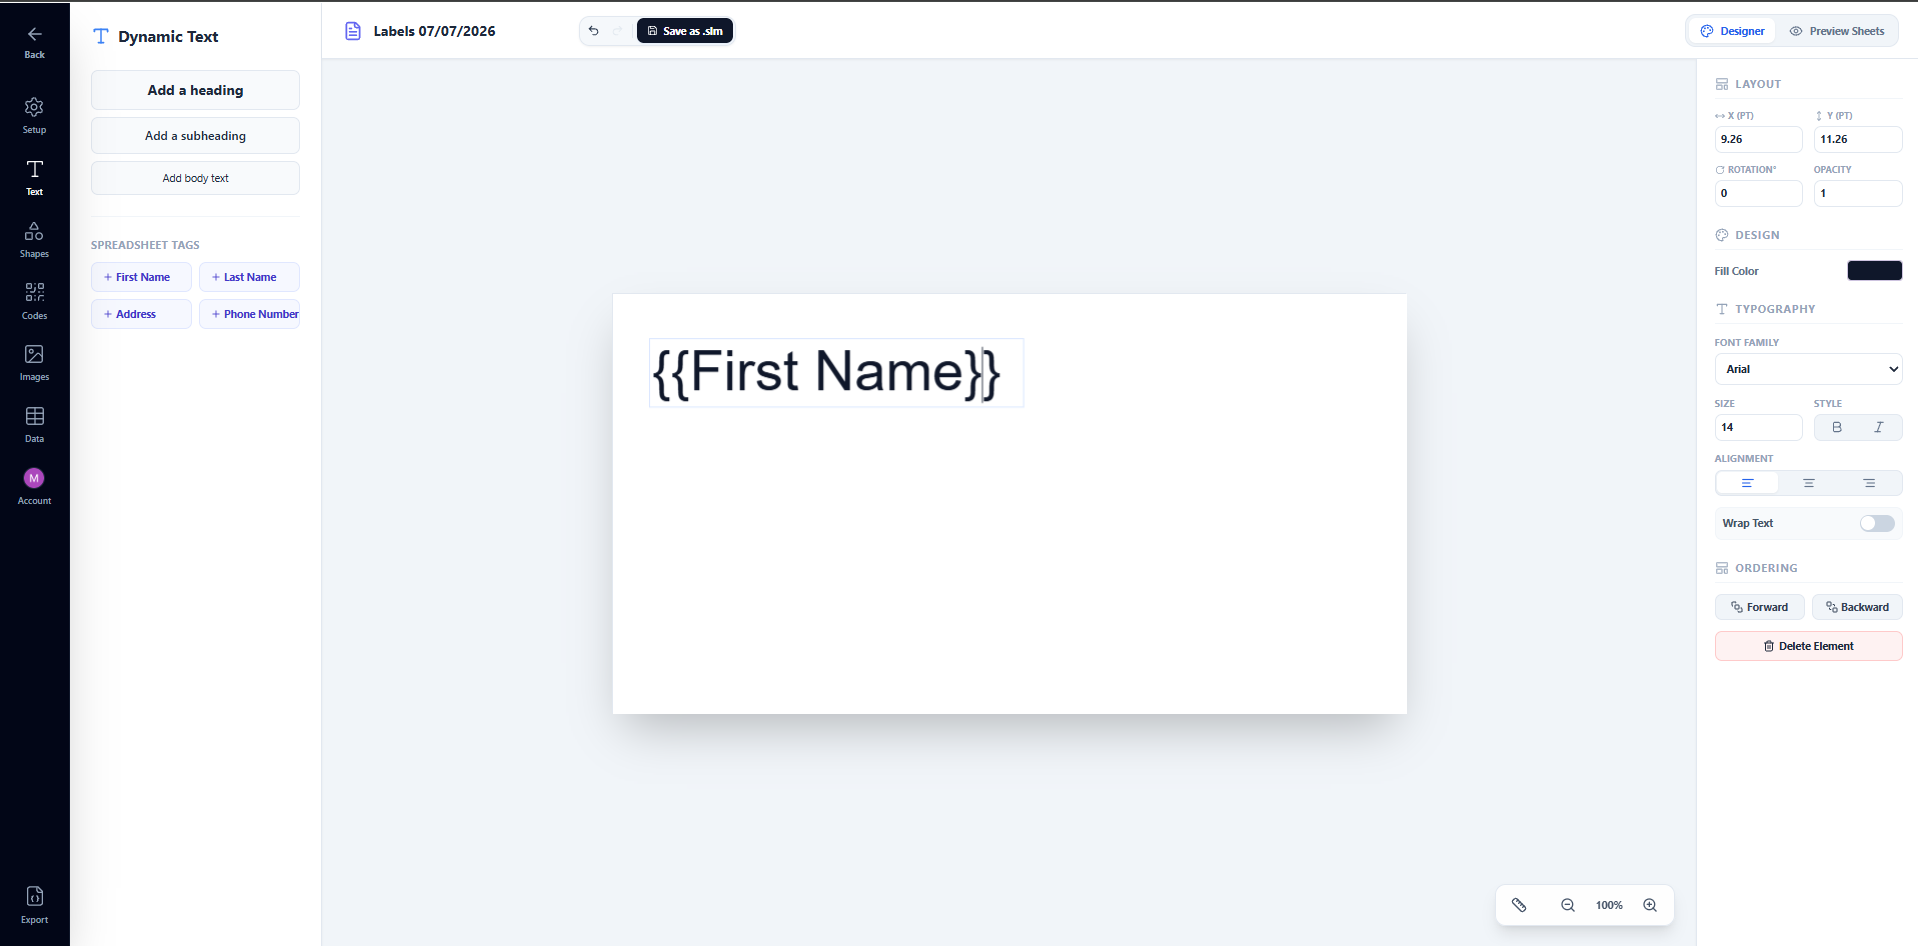
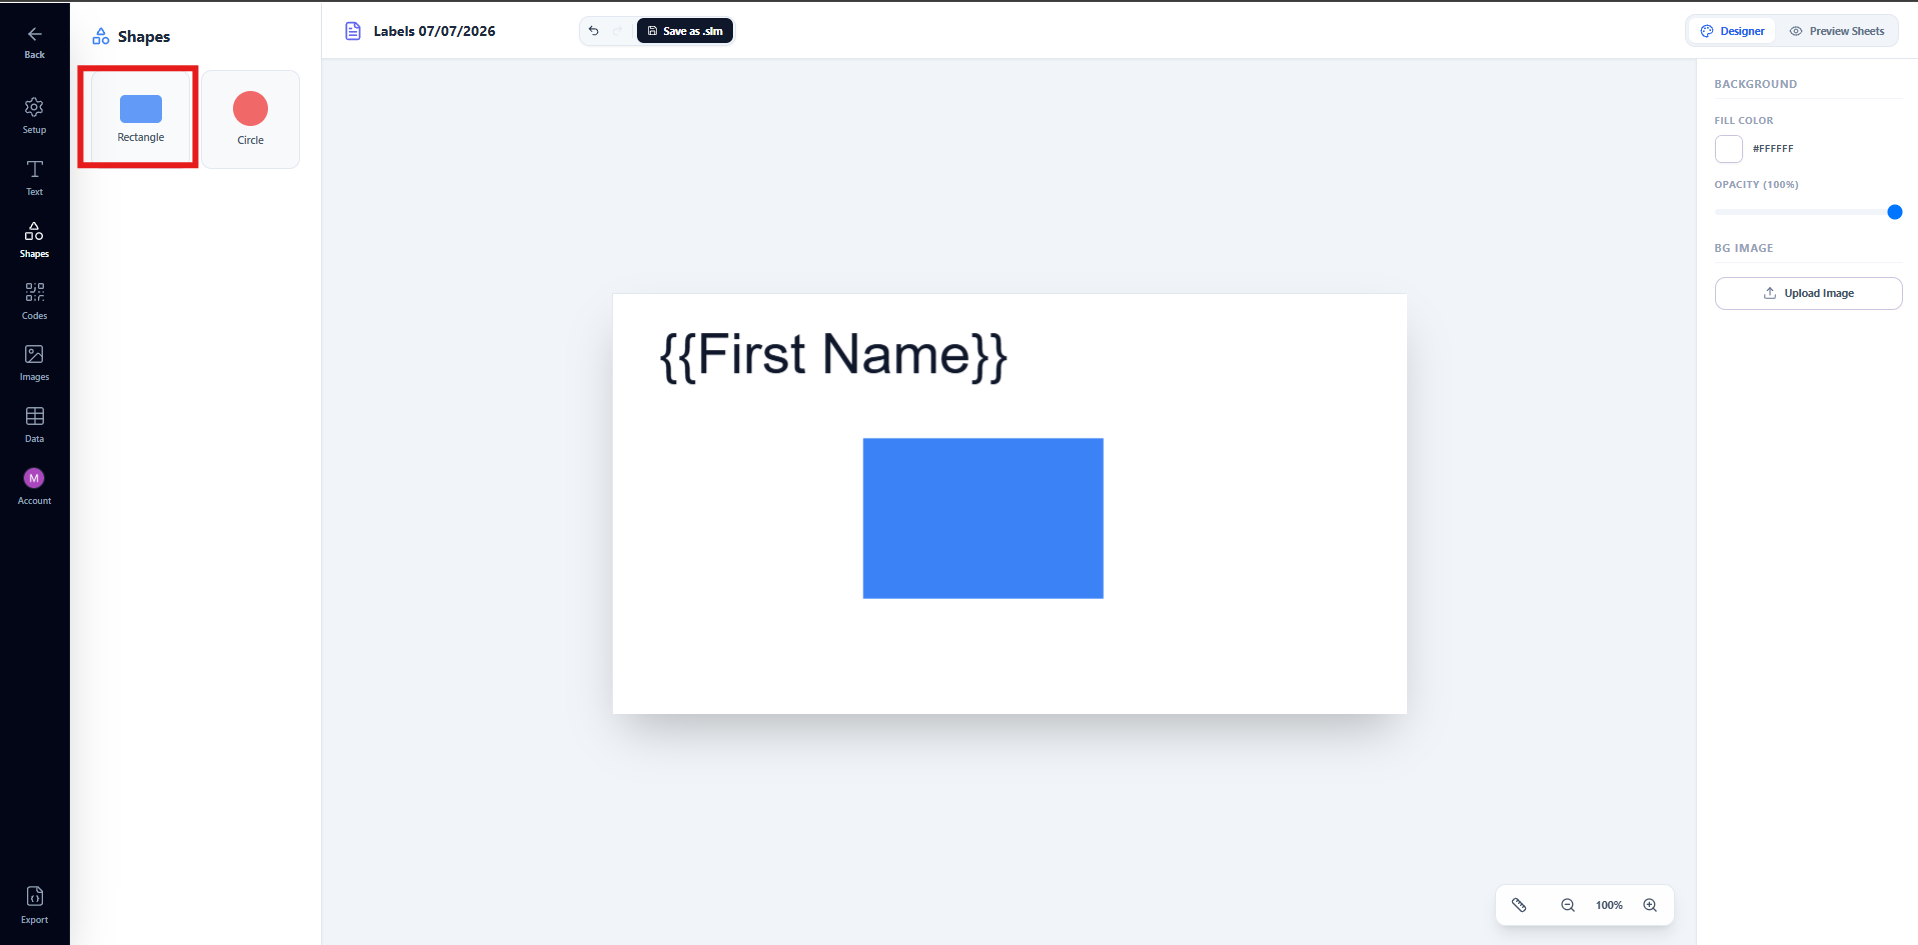
Shapes — Click the Shapes tab to add rectangles or circles. Use the right panel to change fill color, size, rotation, and opacity.
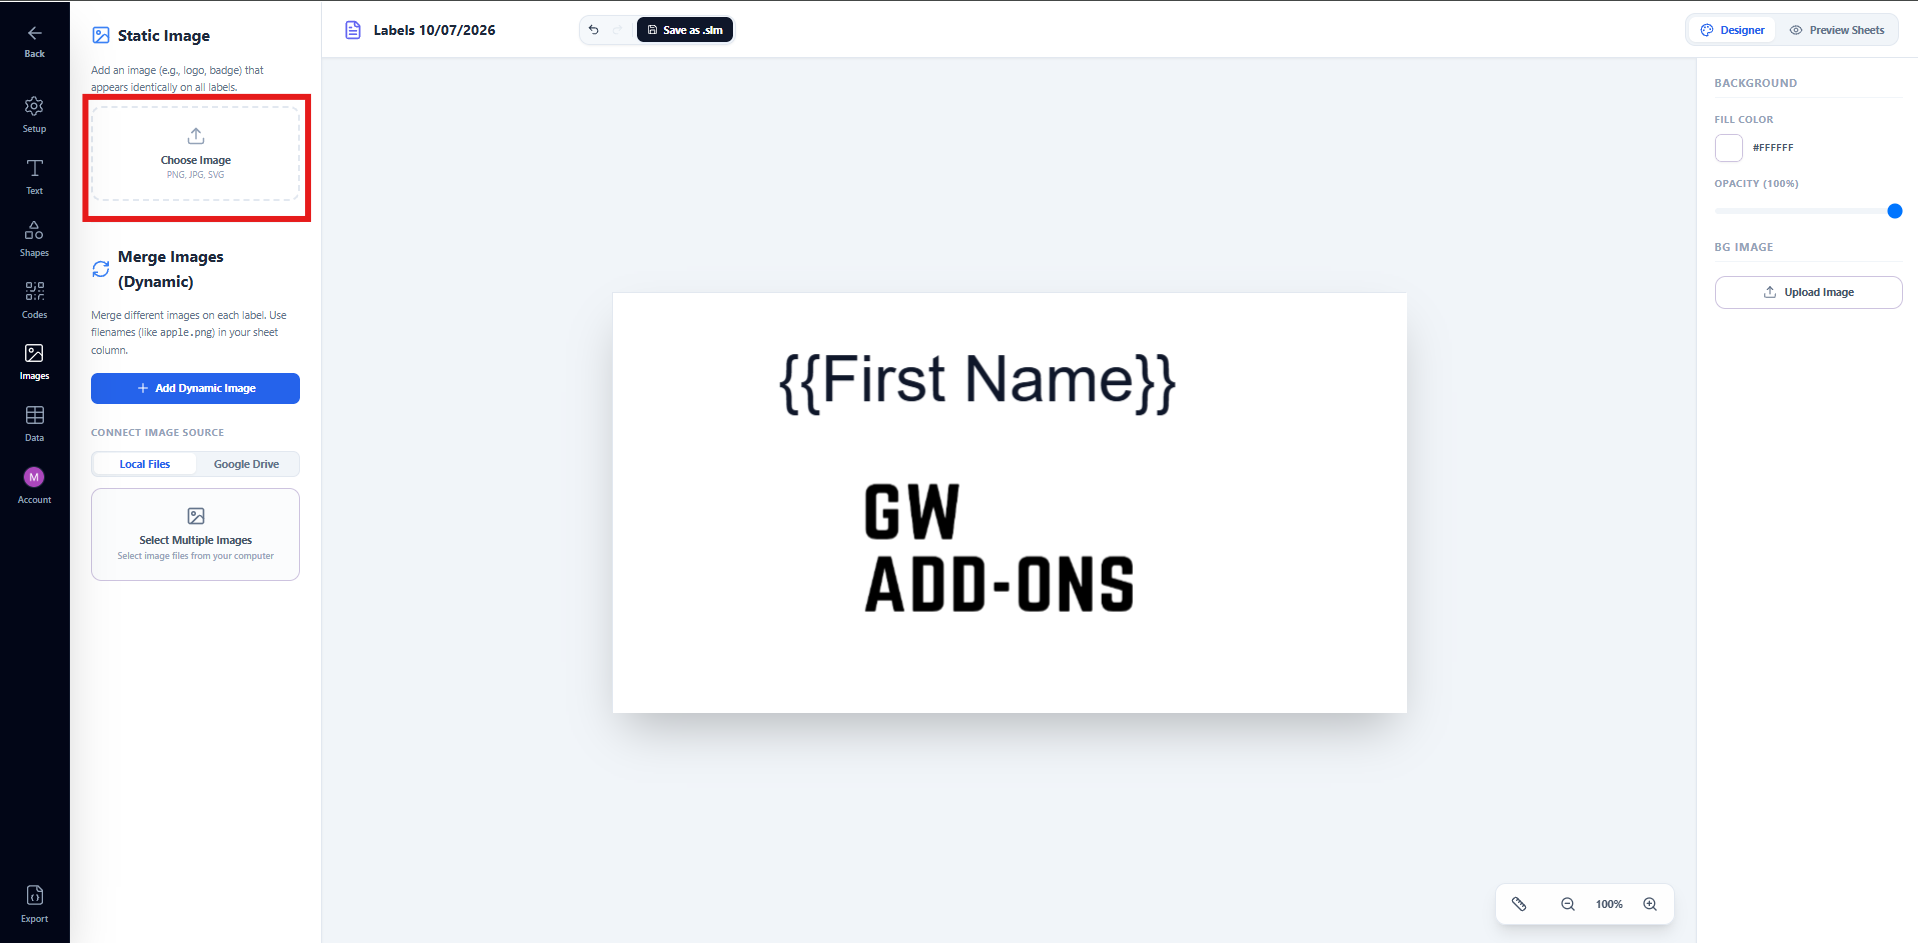
Static Images — Click the Images tab and upload an image from your computer (PNG, JPG, or SVG). Static images appear identically on every label — ideal for logos or brand marks.
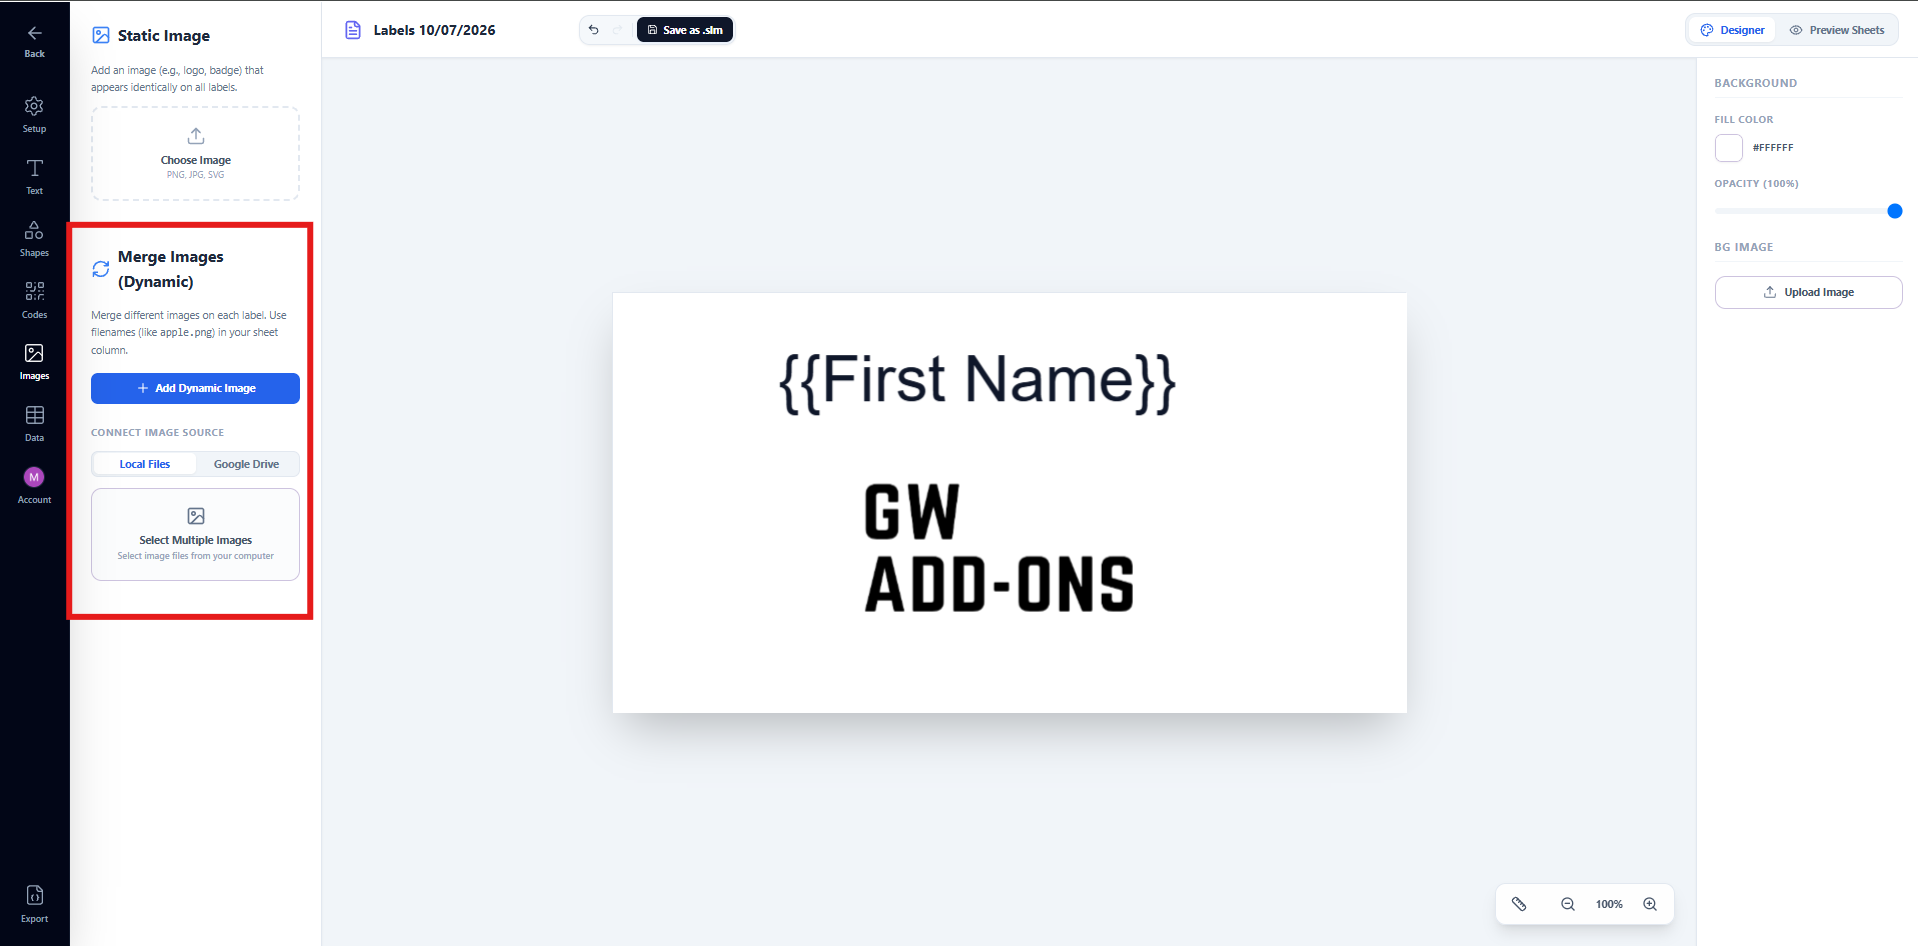
Dynamic Images — Also in the Images tab, click Add Dynamic Image
to place an image placeholder that changes per label. Add a column in your
sheet containing the image filenames (e.g. apple.png), then connect your
image files either from your computer or from a Google Drive folder. Smart
Label Maker matches each row’s filename to the correct image automatically.
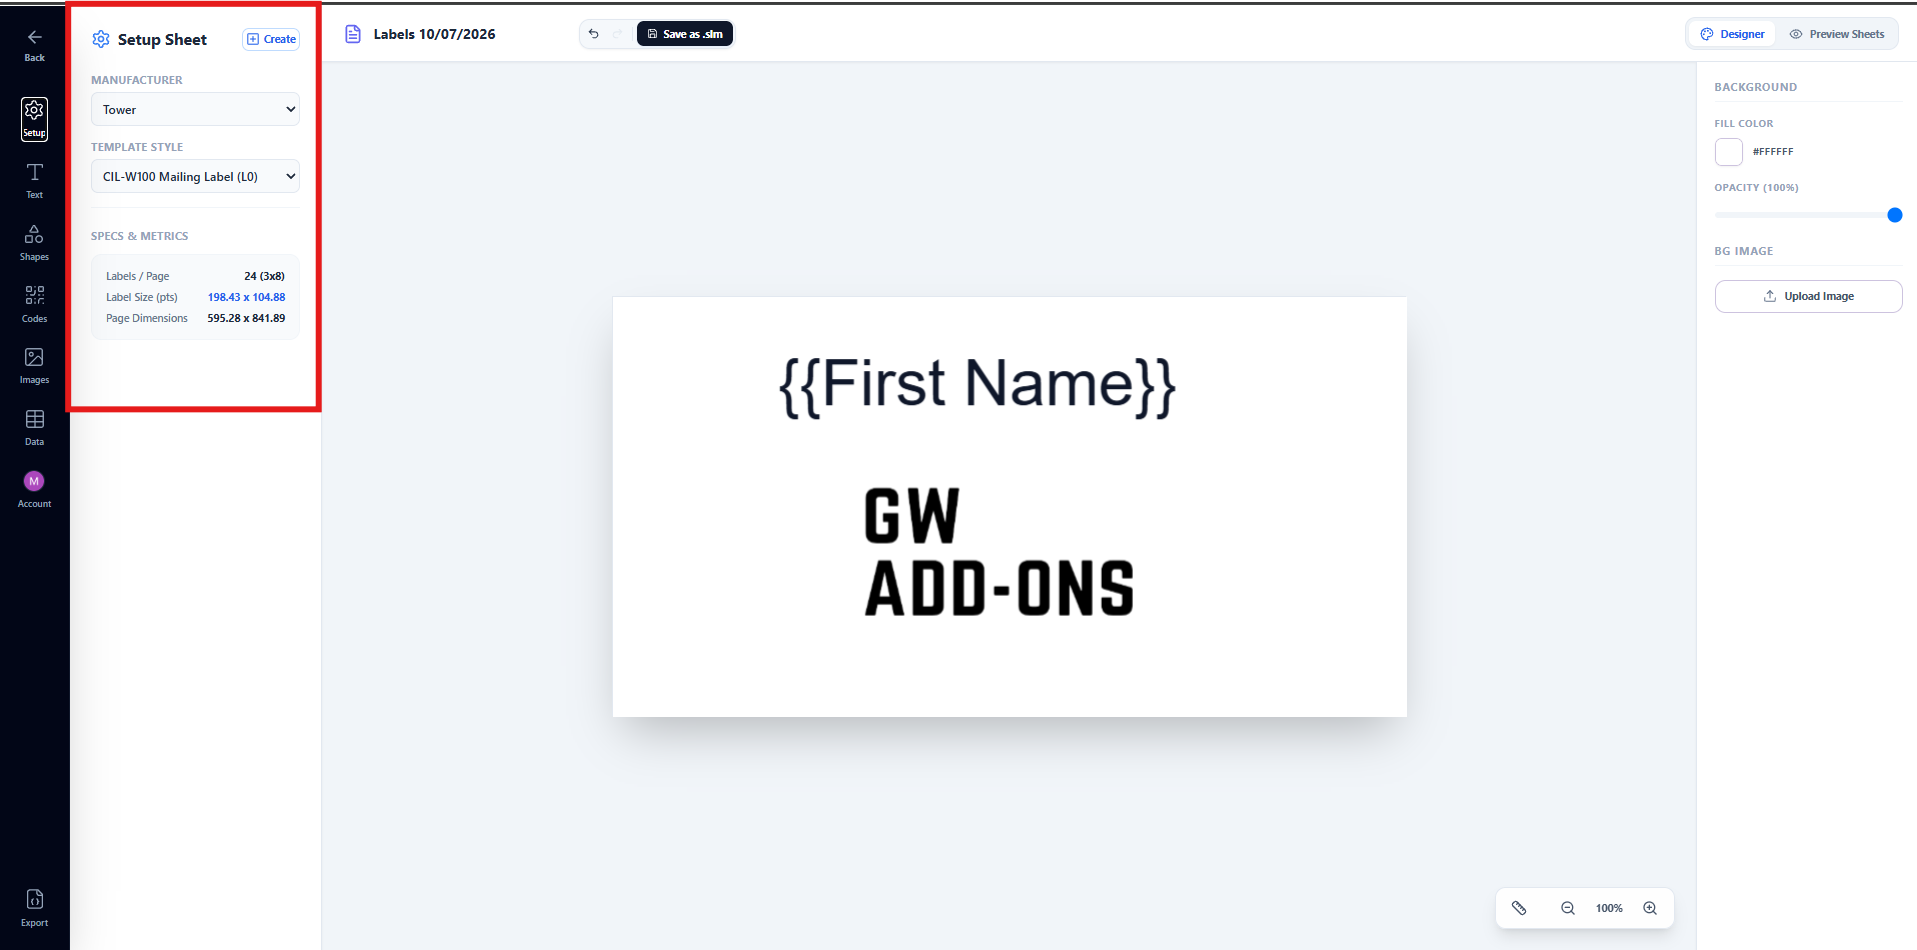
Use the Setup tab to switch between label templates or adjust which manufacturer and template style you are using. The Specs & Metrics panel shows the exact label dimensions and grid layout for the selected template.
6. Preview your labels
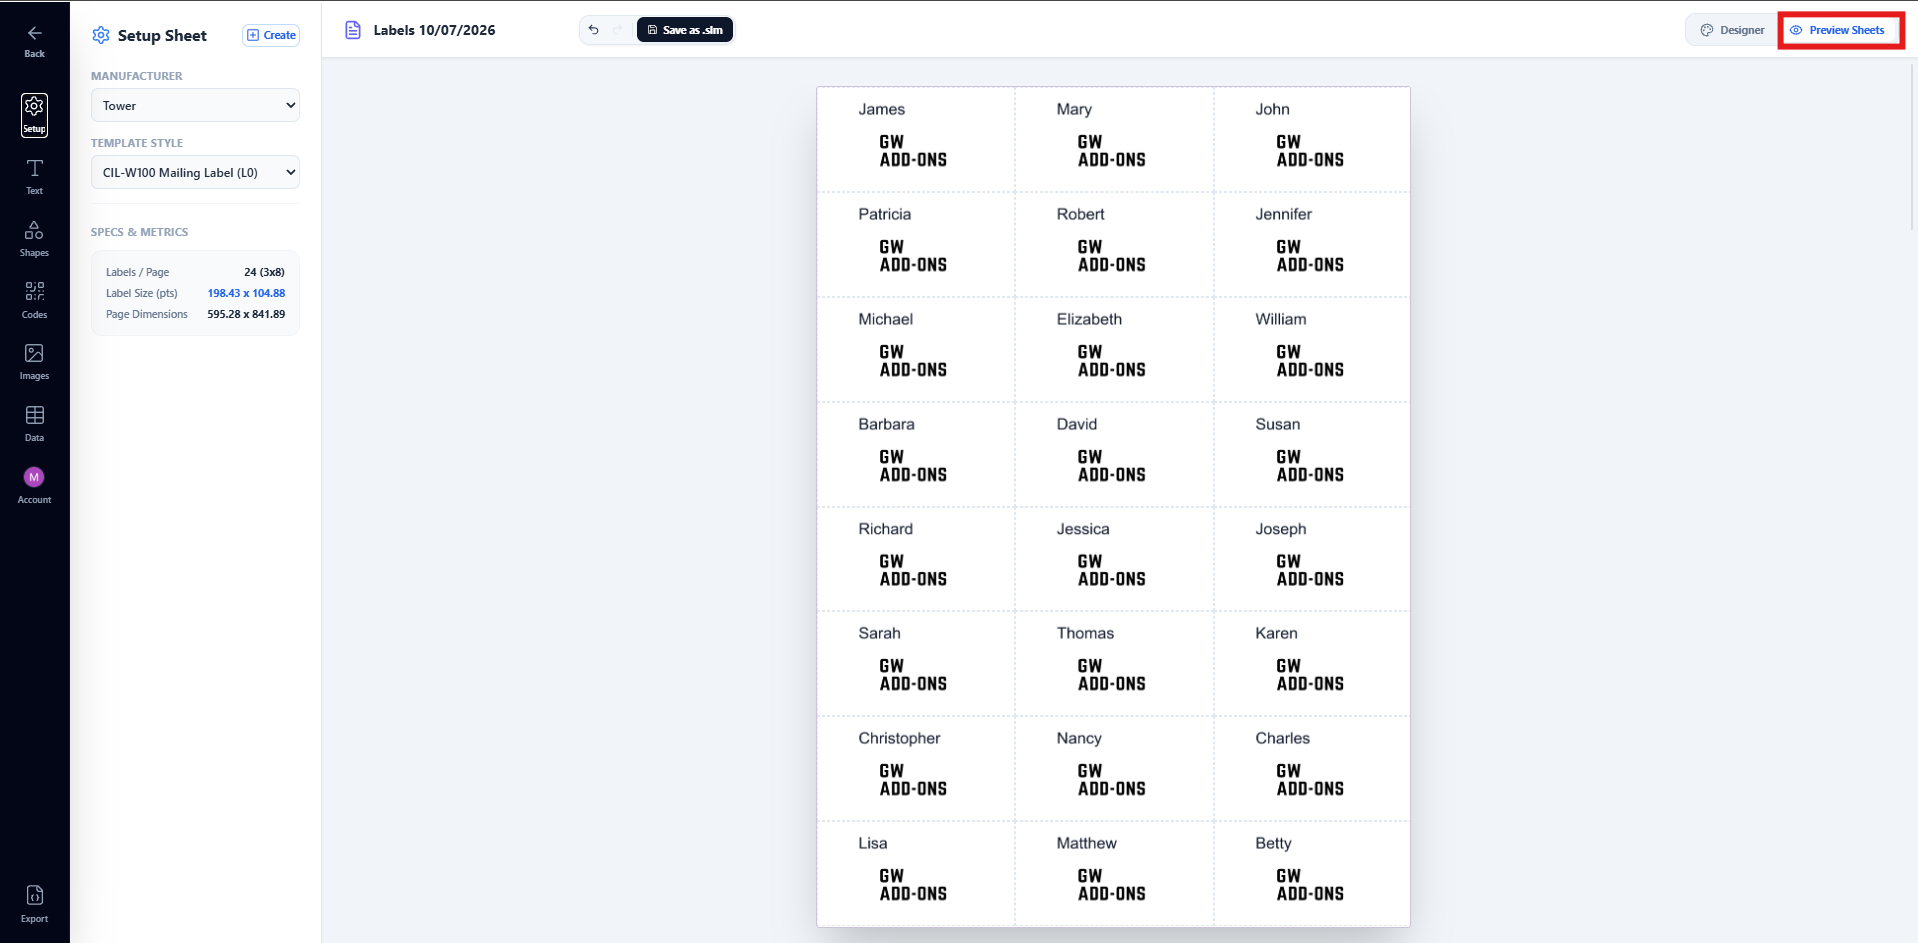
Click Preview Sheets in the top bar of the designer to switch from the design canvas to a live multi-page preview. Smart Label Maker renders every label with your real spreadsheet data merged in — including text, barcodes, QR codes, and dynamic images — exactly as they will appear in the final PDF.
Scroll through all the pages to confirm the layout, spacing, and merged data look correct. If anything needs adjusting, click Designer in the top bar to return to the canvas and make changes.
7. Generate PDF
When your design is ready, click the Export tab in the left sidebar. You have two options:
Download PDF — generates the complete merged label sheet and downloads it directly to your computer as a PDF file.
Save to Drive — generates the PDF and saves it straight to your Google Drive. A link to open the file appears immediately after saving. Your recently saved PDF exports are also listed in the Export tab for quick access.
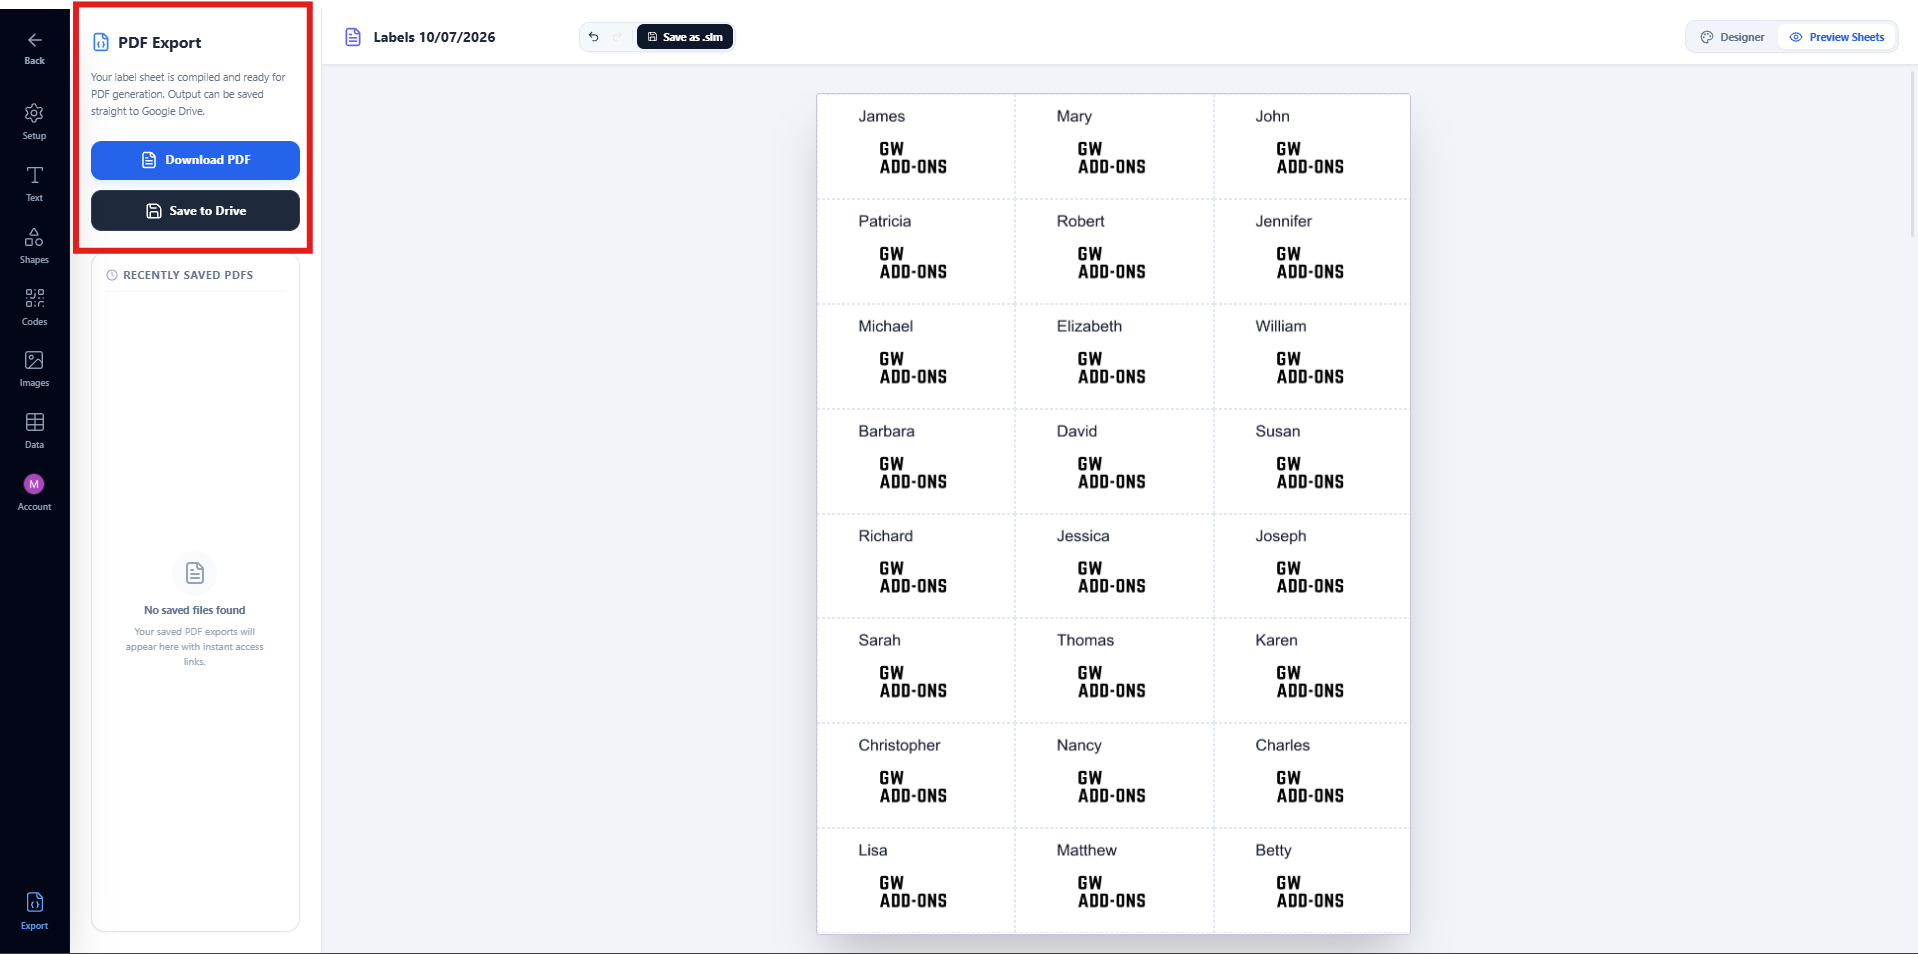
Smart Label Maker merges all rows from your connected spreadsheet into the label sheet automatically, producing as many pages as needed to fit all your records.
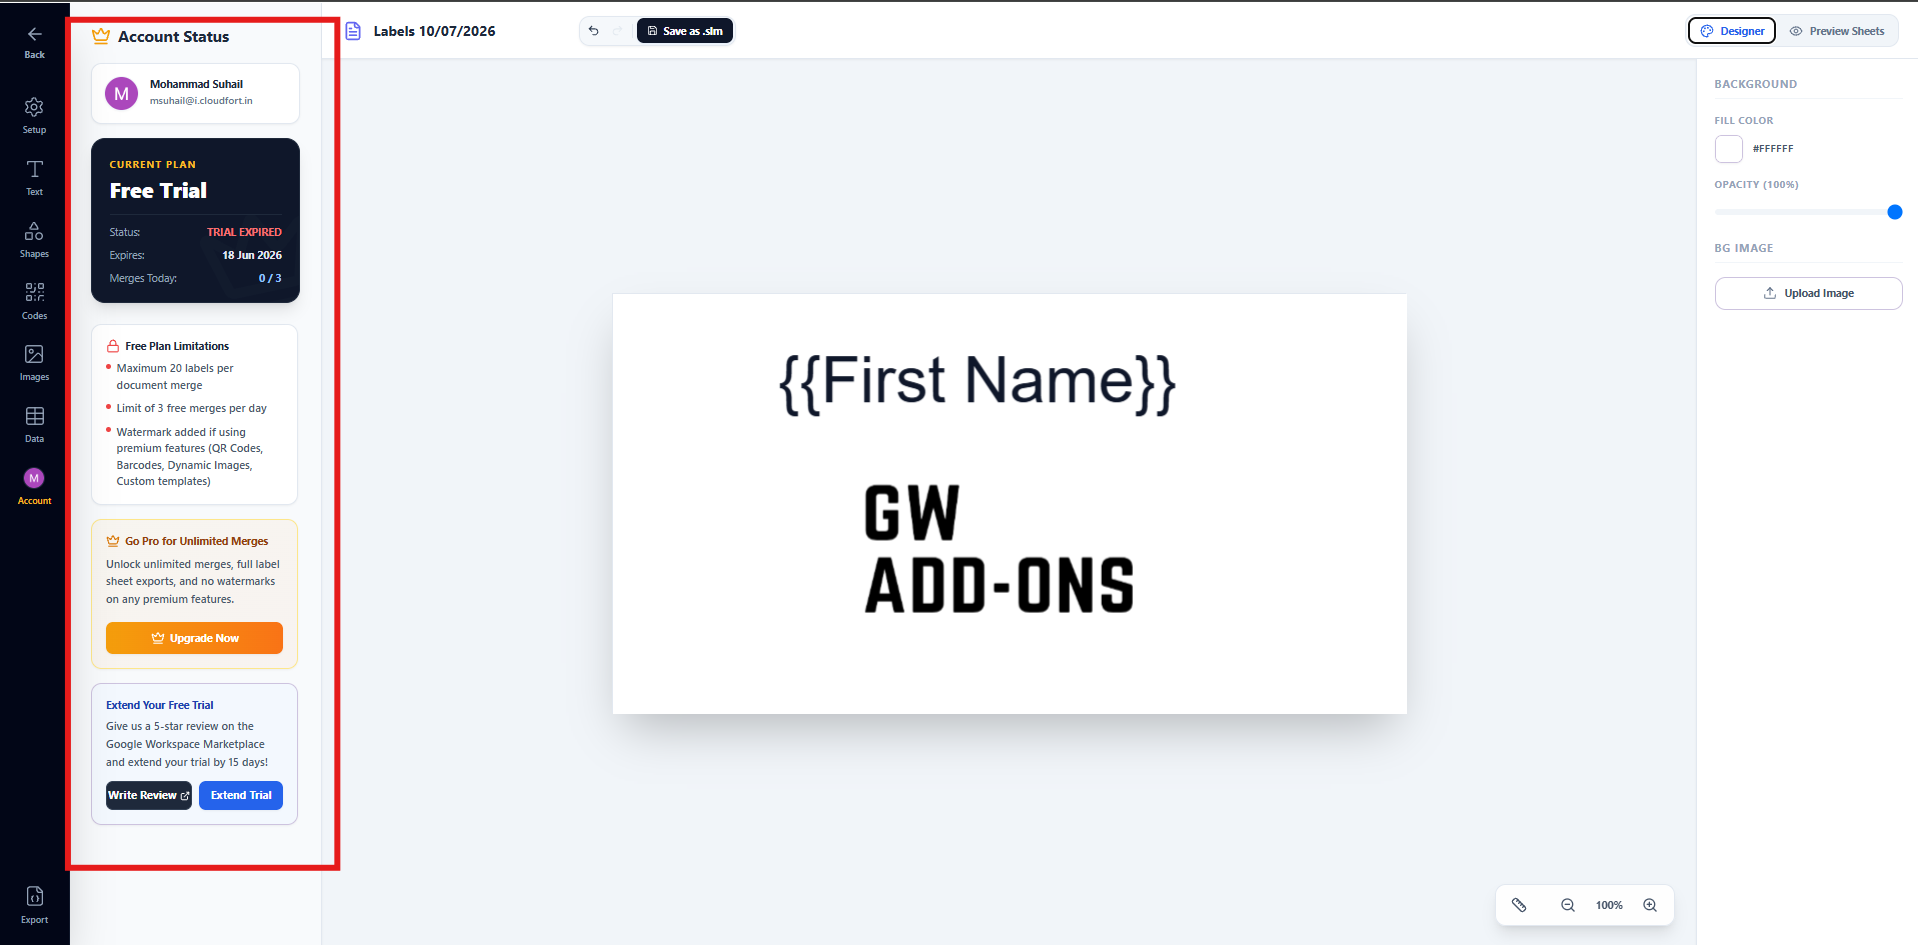
Free plan note: Free accounts are limited to 20 labels per export and 3 exports per day. Upgrade to Pro for unlimited labels, unlimited daily exports, and watermark-free output including QR codes, barcodes, dynamic images, and custom templates.
8. Print labels
Open the downloaded PDF or the file saved to your Google Drive. In your PDF viewer or browser, click File → Print. In the print dialog, make sure to:
- Set the scale to 100% or Actual Size — never use “Fit to page” or “Shrink to fit” as this will shift your label positions
- Set margins to None
- Confirm the paper size matches your physical label sheet (e.g. US Letter or A4)
These settings ensure your labels align precisely with the perforations on your physical label sheets.